Lego Gameboy mit Funktion
Einleitung
Die Komponenten
Beschreibung:
Was wird alles benötigt
| Name | Funktion | Shop URL | Bild | Anzahl |
| Lego Gameboy | Das Gehäuse | Gameboy Shop URL | 1 | |
| Kupferdraht | Verbindungen für die Buttons, Soundchip, NFC, und Potis |
|
|
1 |
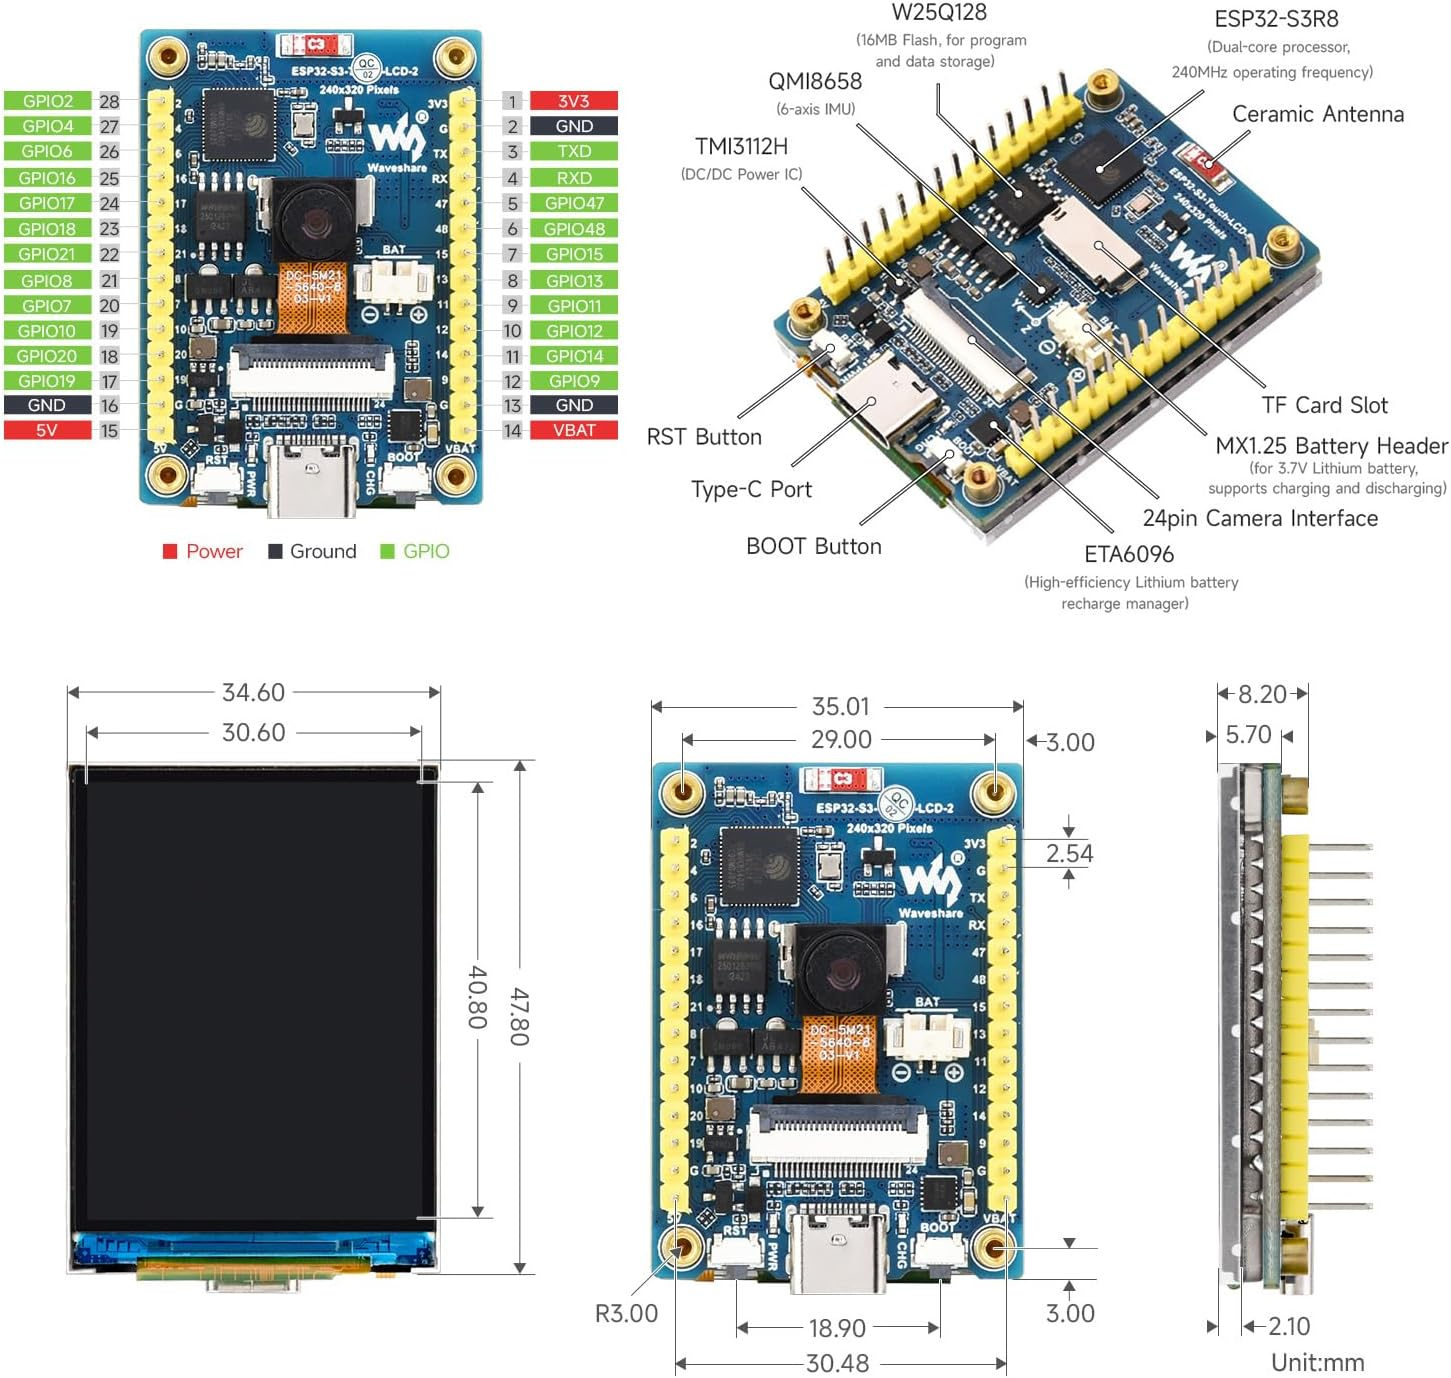
| Waveshare 2inch ESP32-S3 Display Development Board, 240x320 | Display mit SD Card Bat und ESP32 mit GPIO PINS |
|
|
1 |
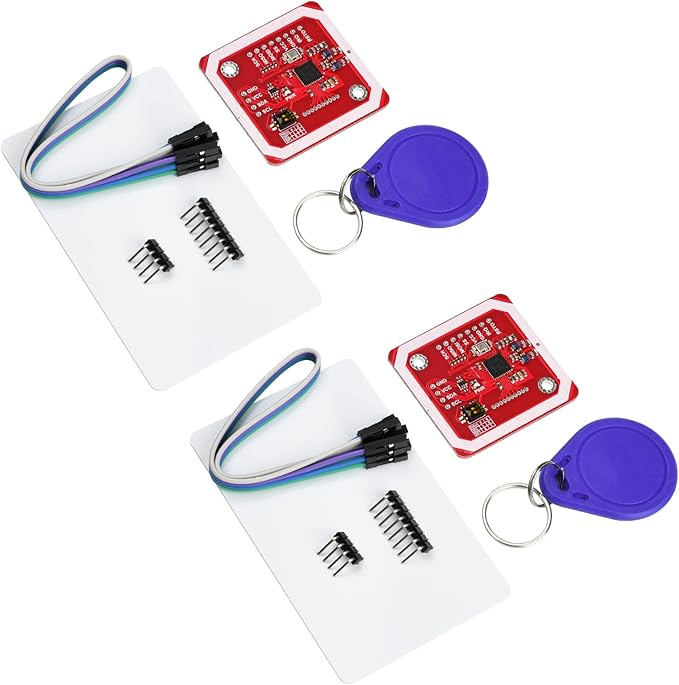
| Aideepen 2 Stück PN532 NFC NXP RFID-Modul V3 Kit Reader | NFC Reader |
|
|
1 |
| SKULLPAPER® Wasserschiebefolie WEISS für Tintenstrahldrucker - hauchdünn DIY Decal | Etiketten Papier für die Spiele Kassetten Anzahl unendlich, je nach Anzahl der Spiele |
|
|
∞
|
| EEMB Lithium Polymer Akku 3,7 V 1800mAh 963450 Wiederaufladbarer Lipo-Akku mit JST-Anschluss für VXI Blue | Akku halt |
|
|
1 |
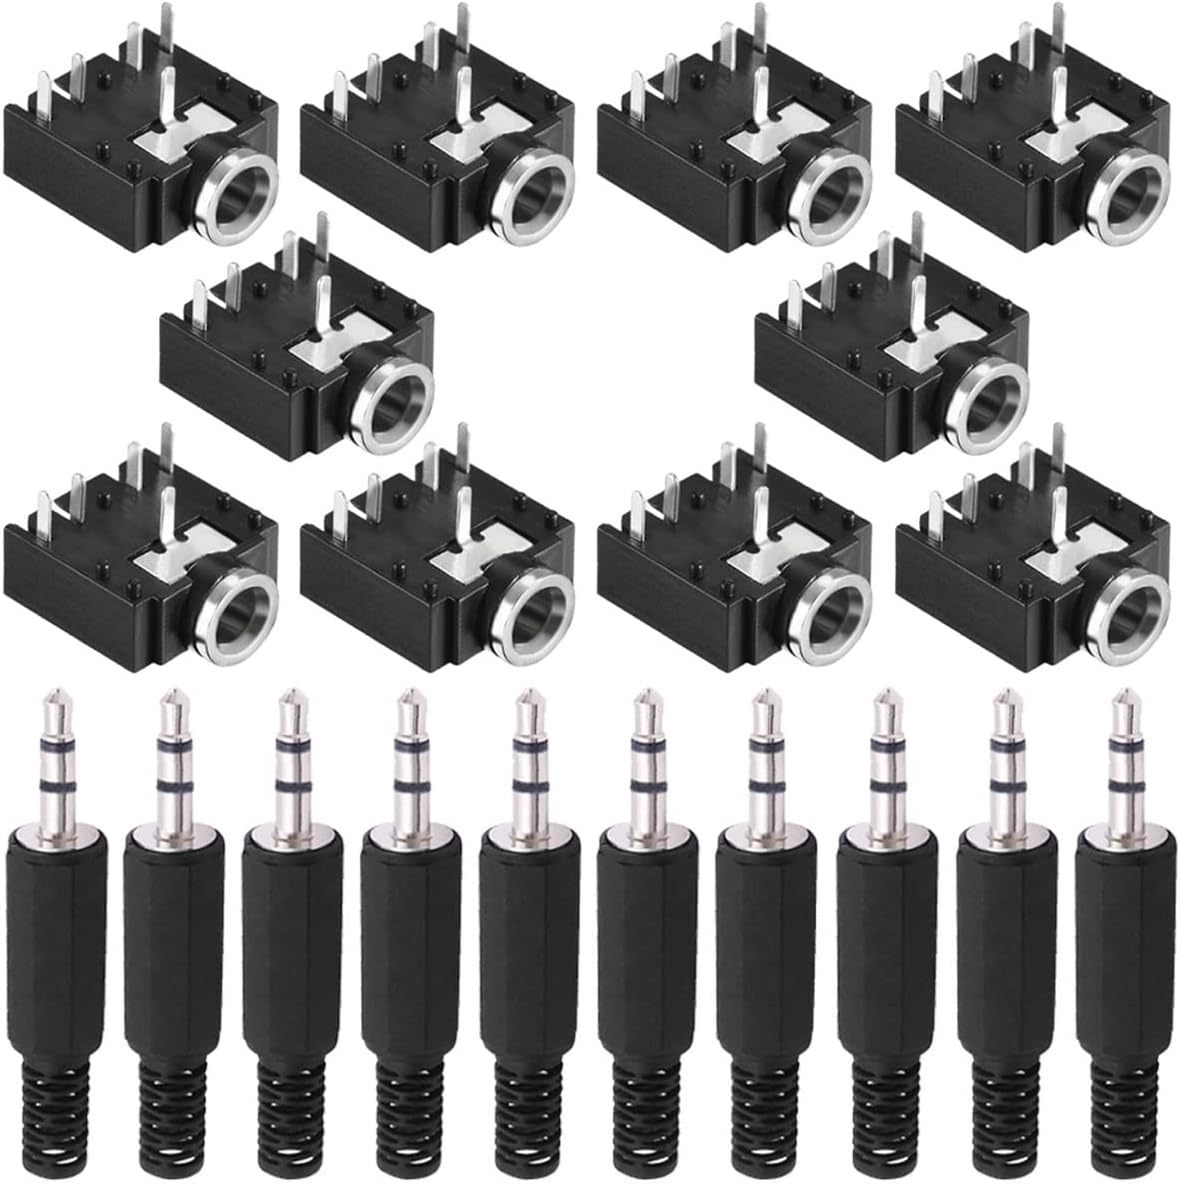
| Youmile 10 Stück PJ-307 3,5 mm Stereo Audio Klinkenbuchse 5 Pin Leiterplattenmontage Buchse für Audio Kopfhöreradapter für Video/Audiogeräte mit 10 Stück 3,5 mm TRS Steckeradapte | 3,5 Kopfhörer Klinke mit Lautsprecher unterbrecher wenn Kopfhörer eingesteckt |
|
|
1 |
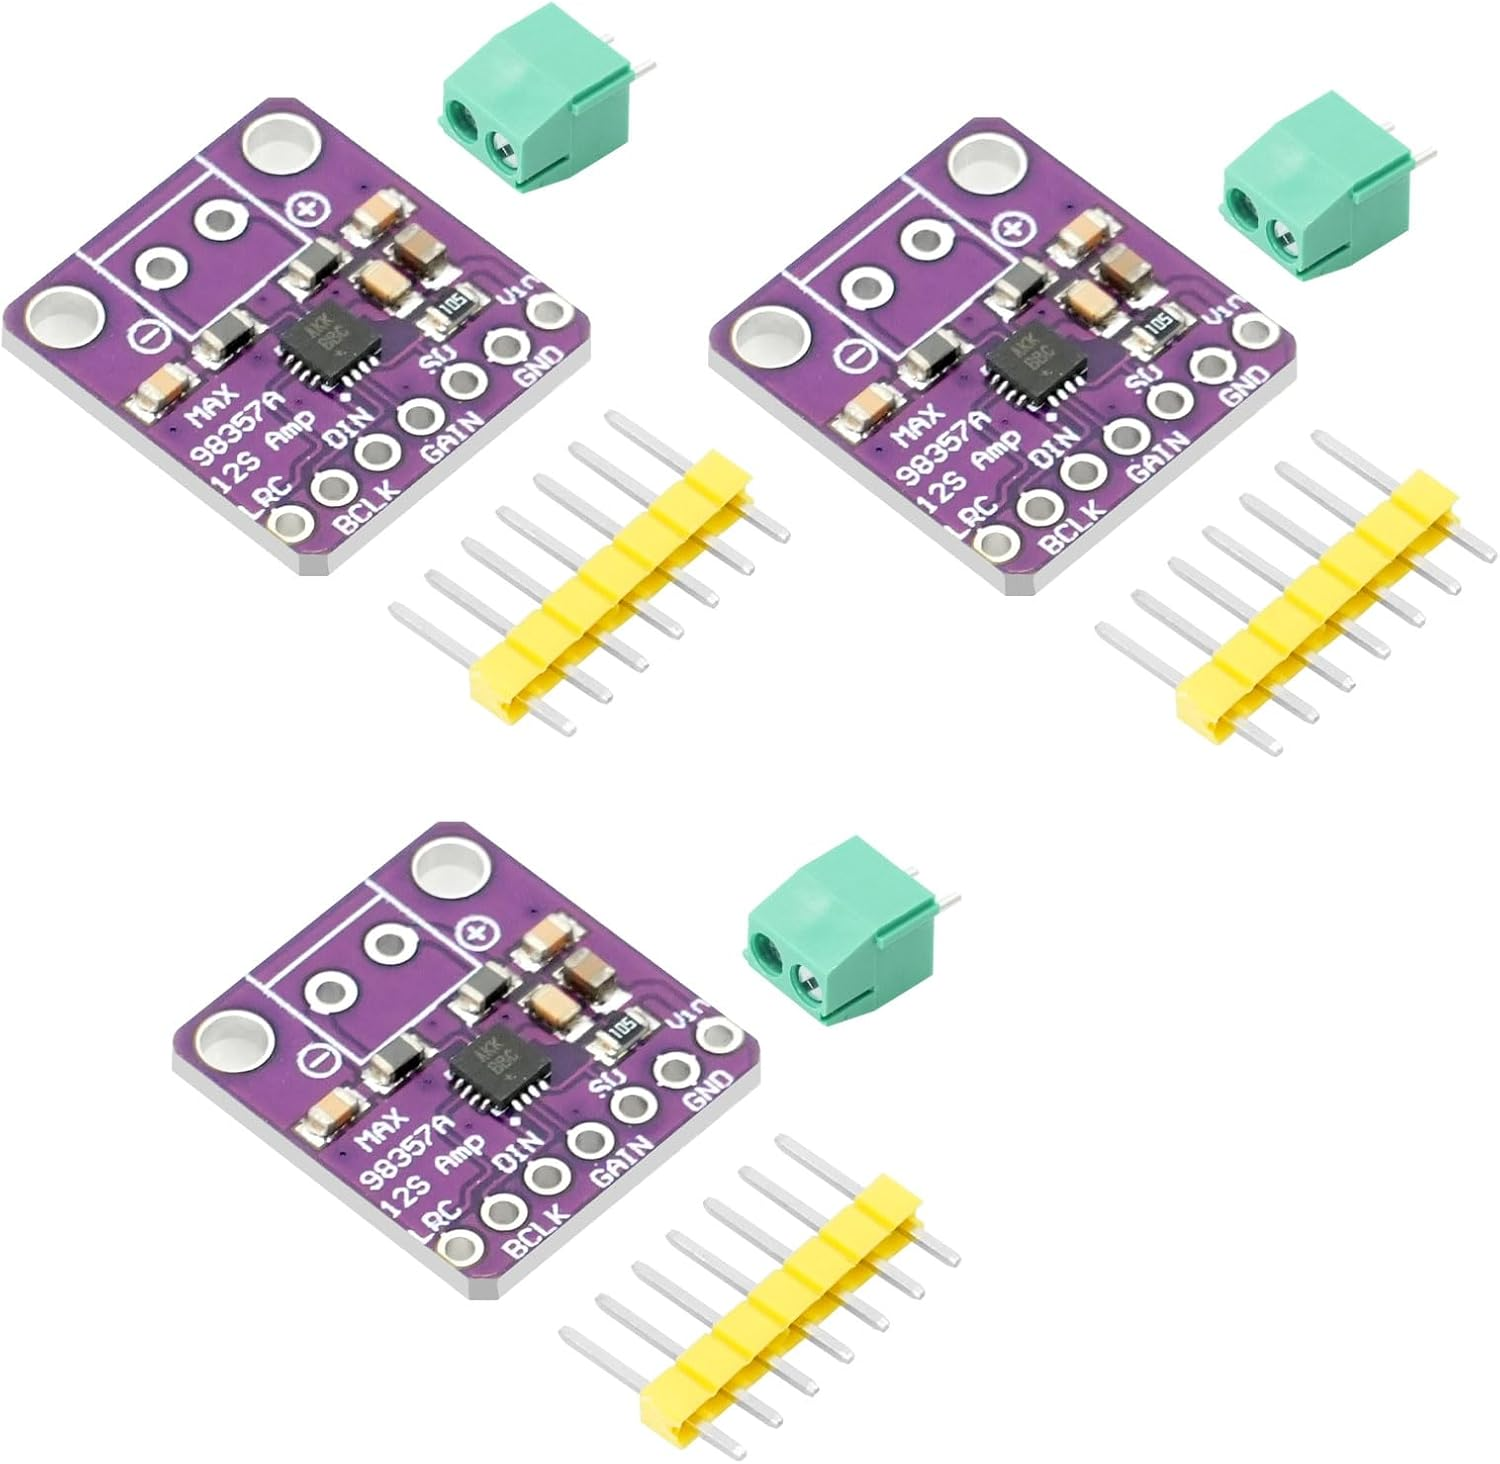
| MAX98357 I2S 3W Klasse D Audio Verstärkermodul AYWHP 3 PCS DAC Decoder Modul Audio Board I2S DAC Decode | Sound Chip |
|
|
1 |
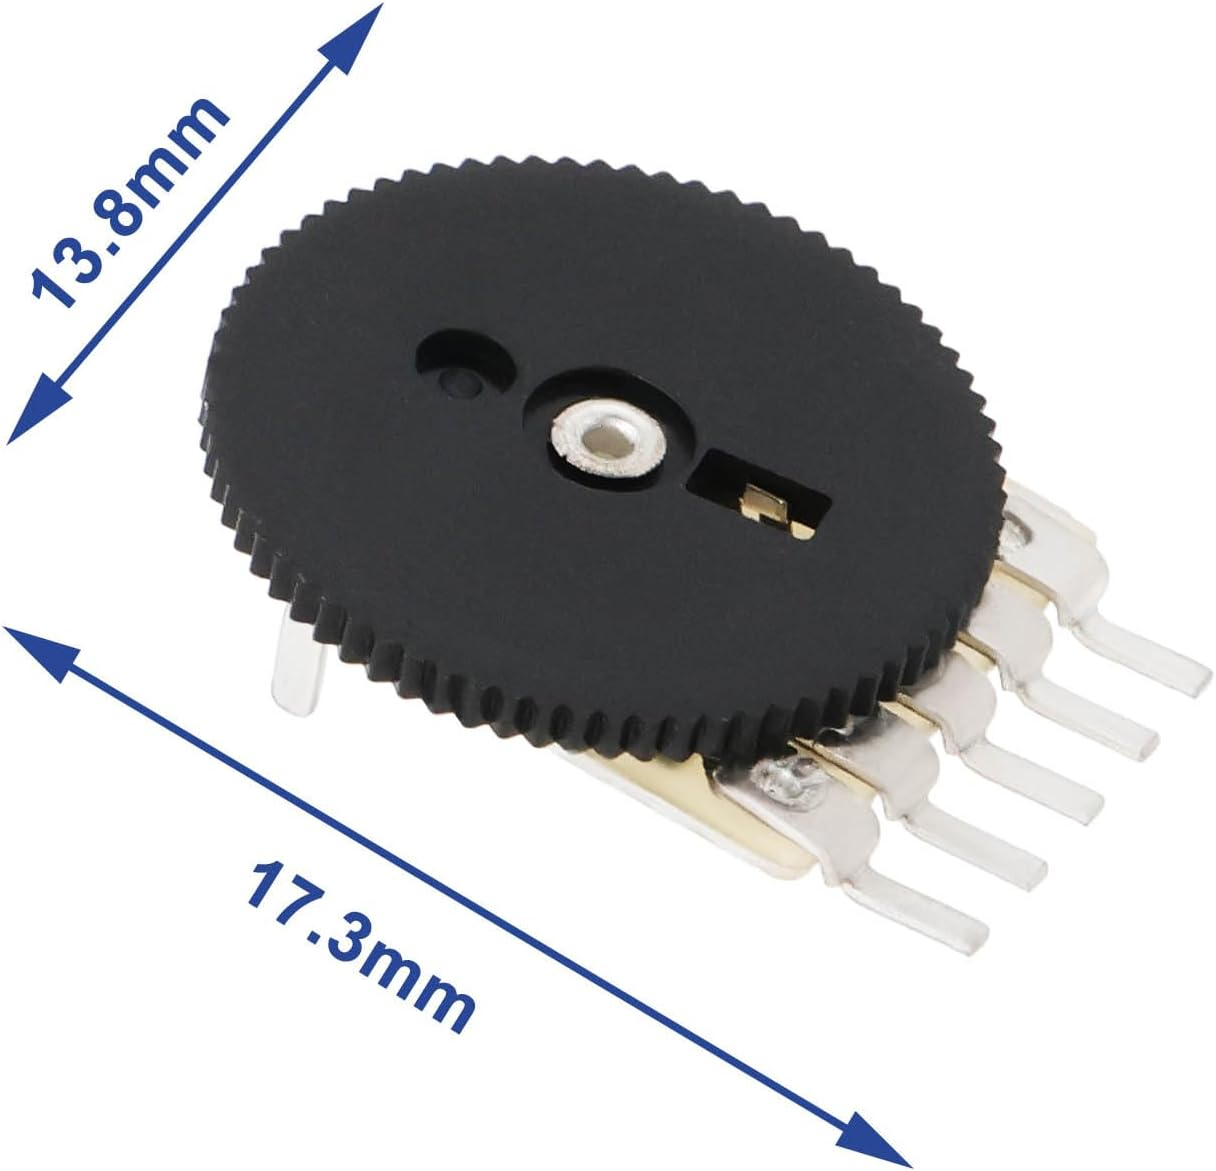
| Poti 13,8 cm Raddurchmesser | Poti für Helligkeit und Lautstärke |
|
|
2 |
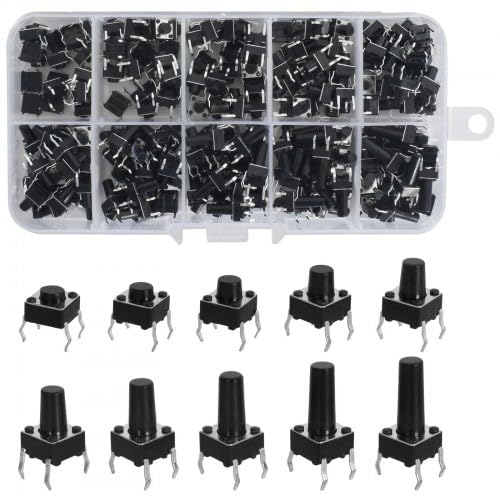
| 200 Stück Miniatur-Mikro Schalter,10 Types 4 Pin Tactile Drucktaster 6x6mm Momentaner taktiler Button Switch berühren Electronic Components,für Panel PCB | Buttons, ne 200 Kiste ist günstiger als einer. Wir brauchen aber nur 8 |
|
|
8 |
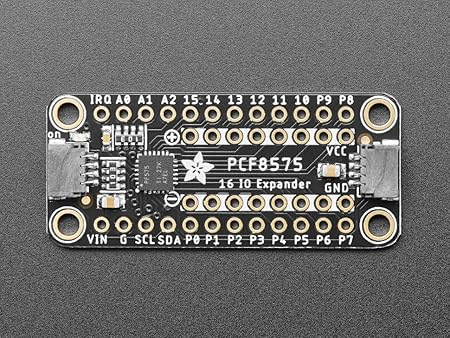
| Adafruit PCF8575 I2C 16 GPIO Expander Breakout, Stemma QT/Qwiic, 5611 | Ein I2C Expander für weitere 16 PINS |
|
|
|
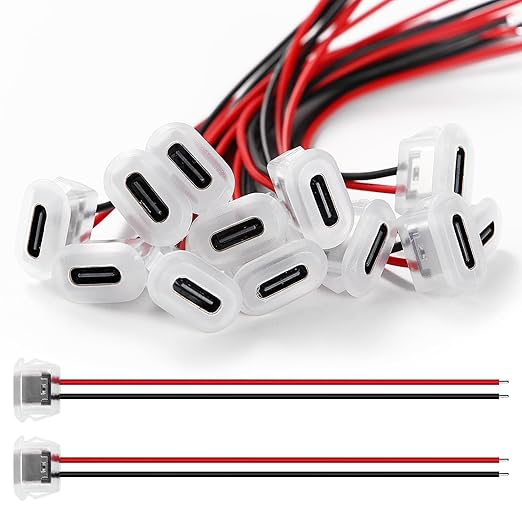
| USB C Buchse | USB C Buchse |
|
|
|
| 3D File für Display |
Die Datei ist selbst erstellt aus lDraw File 42205 und dem Display Case von Benutzer: https://www.printables.com/model/1188149-enclosure-for-esp32-s3-touch-lcd-2/files
|
|
|
|
| 3D File USB C Buchse |
https://www.thingiverse.com/thing:6932136
|
|
|
|
| Lego Brick for Power Schalter |
https://www.thingiverse.com/thing:3419081
|
|
|
|


Werkzeuge
| Name | Verwendung | Links |
| Flussmittelstift | Damit das Lötzinn besser auf den Kontakten haftet |
|
| Seitenschneider klein | Um Draht etc zu schneiden |
|
| Seitenschneider Groß | UM PCB zu Schneiden |
|
| Lötkolbenreiniger | Besser als die Nassen Schwämme, Kein Wasser nötig |
|
| Akku Lötkolben ohne Kabel | Lötkolben ohne Kabel, mal ein Versuch Wert 12-15W, nehmt nicht die spitze Spitze sondern die Abgeflachte die dabei ist |
|
Gameboy / NES Software
| Software Projekt | Beschreibung | Link |
| ESP32 Handheld | ESP32 Nes | https://www.instructables.com/ESP32-Handheld-Game-Console/ |
| NesCat ESP32 | Ein ESP32 NES Emualtor | https://github.com/markoni985/NesCat |
| ESP32 Gameboy | ILI9341 Display Variante | https://github.com/lualiliu/esp32-gameboy |
Hardware zusammenbau und Testen
Beschreibung:
Zusammenbau am Steckbrett und Testsoftware.
### *** DISPLAY PINS sind intern verbunden, werden hier nur für die Programmierung aufgelistet :**
```
TFT_SCLK 39
TFT_MOSI 38
TFT_MISO 40
TFT_DC 42
TFT_CS 45
TFT_RST -1
TFT_BL 1
```
Buttons:
UP: GPIO 2 → GND (mit Pullup)
DOWN: GPIO 3 → GND
LEFT: GPIO 4 → GND
RIGHT: GPIO 5 → GND
A: GPIO 6 → GND
B: GPIO 7 → GND
START: GPIO 8 → GND
SELECT: GPIO 9 → GND
```
### **Potis (10kΩ):**
```
POT_VOLUME: GPIO 10 (Mittelpin), GND + 3.3V
POT_BRIGHT: GPIO 11 (Mittelpin), GND + 3.3V
```
### **MAX98357A Audio:**
```
BCLK: GPIO 12
LRC: GPIO 13
DIN: GPIO 14
VIN: 5V oder 3.3V
GND: GND
```
### **PN532 NFC:**
```
SDA: GPIO 48 (shared mit Touch)
SCL: GPIO 47 (shared mit Touch)
```
### **SD Card:**
```
CS: GPIO 15 (nutzt SPI vom Display)IDE installieren
Nachdem die IDE installiert müssen wir unser Board auswählen und ein paar Pakete installieren.
Ert board auswählen

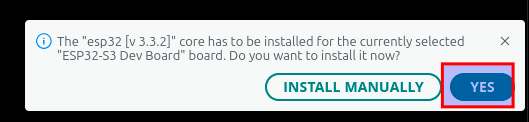
Dann werden wir gefragt ob wir das Paket für ESP32 installieren wollen, da klciken wir auf yes
Dazu klicken wir auf das Library Manager Symbol
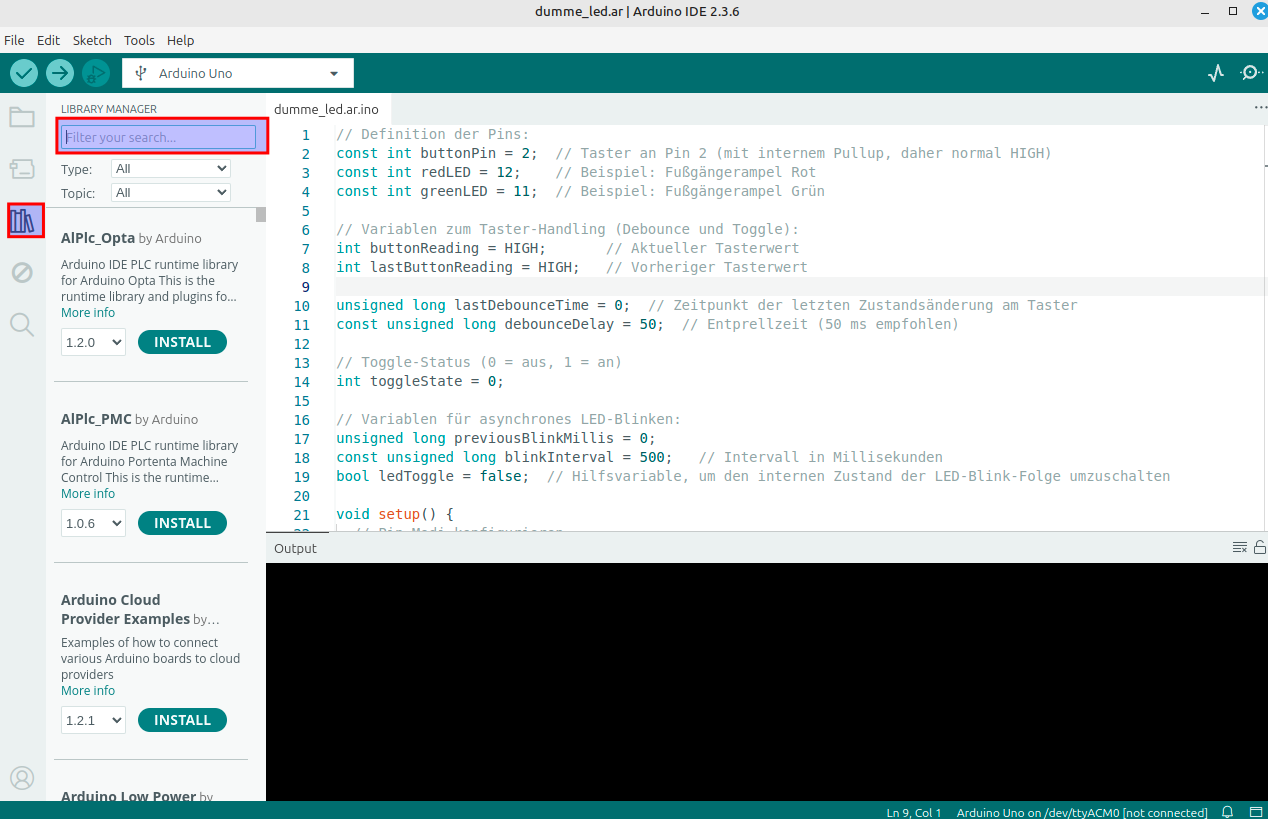
Geben als Suchbegriff folgende namen ein und installieren diese.
Hintereinander eingeben, natürlich
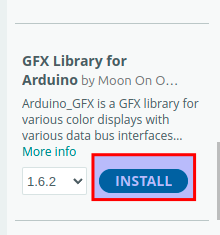
| Library Name | Suchbegriff | Bild |
| GFX Library for Arduino | *arduino*gfx* |
|
| Adafruit PN532 | Adafruit PN532 |
|

Nun das Testprogramm einfügen
Testprogramm
#include <Arduino.h>
#include <Arduino_GFX_Library.h>
#include <Wire.h>
#include <SD.h>
#include <SPI.h>
#include <driver/i2s.h>
// ===== DISPLAY PINS =====
#define TFT_SCLK 39
#define TFT_MOSI 38
#define TFT_MISO 40
#define TFT_DC 42
#define TFT_CS 45
#define TFT_RST -1
#define TFT_BL 1
// ===== BUTTON PINS (mit INPUT_PULLUP) =====
#define BTN_UP 2
#define BTN_DOWN 3
#define BTN_LEFT 4
#define BTN_RIGHT 5
#define BTN_A 6
#define BTN_B 7
#define BTN_START 8
#define BTN_SELECT 9
// ===== POTENTIOMETER (ADC) =====
#define POT_VOLUME 10 // ADC für Lautstärke
#define POT_BRIGHT 11 // ADC für Helligkeit
// ===== I2S AUDIO (MAX98357A) =====
#define I2S_BCLK 12
#define I2S_LRC 13
#define I2S_DOUT 14
#define I2S_NUM I2S_NUM_0
// ===== NFC (PN532 auf Touch-I2C) =====
#define NFC_SDA 48
#define NFC_SCL 47
#define PN532_I2C_ADDRESS 0x24
// ===== SD CARD =====
#define SD_CS 15
// ===== DISPLAY =====
#define SCREEN_WIDTH 240
#define SCREEN_HEIGHT 320
Arduino_DataBus *bus = new Arduino_ESP32SPI(TFT_DC, TFT_CS, TFT_SCLK, TFT_MOSI, TFT_MISO);
Arduino_GFX *gfx = new Arduino_ST7789(bus, TFT_RST, 0, true, SCREEN_WIDTH, SCREEN_HEIGHT);
// ===== GLOBALE VARIABLEN =====
int volumePercent = 50;
int brightnessPercent = 80;
String nfcUID = "Waiting...";
bool sdCardOK = false;
// ===== CHIPTUNE FREQUENCY TABLE =====
const int NOTE_C4 = 262;
const int NOTE_D4 = 294;
const int NOTE_E4 = 330;
const int NOTE_F4 = 349;
const int NOTE_G4 = 392;
const int NOTE_A4 = 440;
const int NOTE_B4 = 494;
const int NOTE_C5 = 523;
int melody[] = {NOTE_E4, NOTE_E4, 0, NOTE_E4, 0, NOTE_C4, NOTE_E4, 0,
NOTE_G4, 0, 0, 0, NOTE_G4, 0, 0, 0};
int noteDurations[] = {200, 200, 200, 200, 200, 200, 200, 200,
200, 200, 200, 200, 200, 200, 200, 200};
int currentNote = 0;
unsigned long lastNoteTime = 0;
// ===== SETUP I2S AUDIO =====
void setupAudio() {
i2s_config_t i2s_config = {
.mode = (i2s_mode_t)(I2S_MODE_MASTER | I2S_MODE_TX),
.sample_rate = 16000,
.bits_per_sample = I2S_BITS_PER_SAMPLE_16BIT,
.channel_format = I2S_CHANNEL_FMT_ONLY_RIGHT,
.communication_format = I2S_COMM_FORMAT_I2S_MSB,
.intr_alloc_flags = ESP_INTR_FLAG_LEVEL1,
.dma_buf_count = 8,
.dma_buf_len = 64,
.use_apll = false,
.tx_desc_auto_clear = true,
.fixed_mclk = 0
};
i2s_pin_config_t pin_config = {
.bck_io_num = I2S_BCLK,
.ws_io_num = I2S_LRC,
.data_out_num = I2S_DOUT,
.data_in_num = I2S_PIN_NO_CHANGE
};
i2s_driver_install(I2S_NUM, &i2s_config, 0, NULL);
i2s_set_pin(I2S_NUM, &pin_config);
Serial.println("✓ Audio initialized");
}
// ===== PLAY TONE =====
void playTone(int frequency, int duration) {
if (frequency == 0) {
delay(duration);
return;
}
const int sampleRate = 16000;
const int samples = (sampleRate * duration) / 1000;
int16_t sample;
size_t bytes_written;
float amplitude = (volumePercent / 100.0) * 10000;
for (int i = 0; i < samples; i++) {
sample = (int16_t)(amplitude * sin(2.0 * PI * frequency * i / sampleRate));
i2s_write(I2S_NUM, &sample, sizeof(sample), &bytes_written, portMAX_DELAY);
}
}
// ===== SETUP BUTTONS =====
void setupButtons() {
pinMode(BTN_UP, INPUT_PULLUP);
pinMode(BTN_DOWN, INPUT_PULLUP);
pinMode(BTN_LEFT, INPUT_PULLUP);
pinMode(BTN_RIGHT, INPUT_PULLUP);
pinMode(BTN_A, INPUT_PULLUP);
pinMode(BTN_B, INPUT_PULLUP);
pinMode(BTN_START, INPUT_PULLUP);
pinMode(BTN_SELECT, INPUT_PULLUP);
Serial.println("✓ Buttons initialized");
}
// ===== SETUP POTIS =====
void setupPotis() {
pinMode(POT_VOLUME, INPUT);
pinMode(POT_BRIGHT, INPUT);
analogSetAttenuation(ADC_11db);
Serial.println("✓ Potentiometers initialized");
}
// ===== SETUP NFC =====
void setupNFC() {
Wire.begin(NFC_SDA, NFC_SCL);
Serial.println("✓ NFC I2C initialized");
}
// ===== READ NFC (vereinfacht) =====
void readNFC() {
Wire.beginTransmission(PN532_I2C_ADDRESS);
if (Wire.endTransmission() == 0) {
nfcUID = "PN532 Found!";
} else {
nfcUID = "No card...";
}
}
// ===== SETUP SD CARD =====
void setupSD() {
pinMode(SD_CS, OUTPUT);
digitalWrite(SD_CS, HIGH);
if (SD.begin(SD_CS, SPI, 4000000)) {
Serial.println("✓ SD Card initialized");
sdCardOK = true;
testSDCard();
} else {
Serial.println("❌ SD Card init failed");
sdCardOK = false;
}
}
// ===== TEST SD CARD =====
void testSDCard() {
File file = SD.open("/test.txt", FILE_WRITE);
if (file) {
file.println("LEGO GameBoy Hardware Test");
file.close();
Serial.println("✓ SD Write OK");
file = SD.open("/test.txt");
if (file) {
String content = file.readString();
file.close();
if (content.indexOf("LEGO") >= 0) {
Serial.println("✓ SD Read OK");
sdCardOK = true;
}
}
} else {
sdCardOK = false;
}
}
// ===== DRAW BUTTON =====
void drawButton(int x, int y, int w, int h, String label, bool pressed) {
uint16_t color = pressed ? RED : 0x4208;
gfx->fillRoundRect(x, y, w, h, 4, color);
gfx->drawRoundRect(x, y, w, h, 4, WHITE);
gfx->setTextColor(WHITE);
gfx->setTextSize(1);
int16_t x1, y1;
uint16_t tw, th;
gfx->getTextBounds(label.c_str(), 0, 0, &x1, &y1, &tw, &th);
gfx->setCursor(x + (w - tw) / 2, y + (h - th) / 2);
gfx->print(label);
}
// ===== DRAW BAR =====
void drawBar(int x, int y, int w, int h, int percent, String label) {
gfx->setTextColor(WHITE);
gfx->setTextSize(1);
gfx->setCursor(x, y - 12);
gfx->print(label + ": " + String(percent) + "%");
gfx->drawRect(x, y, w, h, WHITE);
int fillWidth = (w - 4) * percent / 100;
gfx->fillRect(x + 2, y + 2, fillWidth, h - 4, GREEN);
}
// ===== DRAW UI =====
void drawUI() {
gfx->fillScreen(BLACK);
// Title
gfx->setTextColor(CYAN);
gfx->setTextSize(2);
gfx->setCursor(10, 5);
gfx->print("HW Test Tool");
// D-Pad
bool up = !digitalRead(BTN_UP);
bool down = !digitalRead(BTN_DOWN);
bool left = !digitalRead(BTN_LEFT);
bool right = !digitalRead(BTN_RIGHT);
drawButton(40, 50, 25, 25, "^", up); // UP
drawButton(40, 100, 25, 25, "v", down); // DOWN
drawButton(15, 75, 25, 25, "<", left); // LEFT
drawButton(65, 75, 25, 25, ">", right); // RIGHT
// A, B Buttons
bool a = !digitalRead(BTN_A);
bool b = !digitalRead(BTN_B);
drawButton(180, 75, 30, 30, "A", a);
drawButton(140, 75, 30, 30, "B", b);
// Start, Select
bool start = !digitalRead(BTN_START);
bool select = !digitalRead(BTN_SELECT);
drawButton(130, 115, 45, 20, "START", start);
drawButton(180, 115, 45, 20, "SEL", select);
// Volume Bar
drawBar(10, 150, 220, 20, volumePercent, "Volume");
// Brightness Bar
drawBar(10, 185, 220, 20, brightnessPercent, "Bright");
// NFC Status
gfx->setTextColor(YELLOW);
gfx->setTextSize(1);
gfx->setCursor(10, 220);
gfx->print("NFC: " + nfcUID);
// SD Card Status
gfx->setCursor(10, 235);
gfx->setTextColor(sdCardOK ? GREEN : RED);
gfx->print("SD Card: ");
gfx->print(sdCardOK ? "OK" : "FAIL");
// Music Status
gfx->setTextColor(MAGENTA);
gfx->setCursor(10, 250);
gfx->print("Music: Playing...");
// Instructions
gfx->setTextColor(WHITE);
gfx->setTextSize(1);
gfx->setCursor(10, 280);
gfx->print("Test all buttons!");
gfx->setCursor(10, 295);
gfx->print("Turn potentiometers!");
}
// ===== SETUP =====
void setup() {
Serial.begin(115200);
delay(1000);
Serial.println("\n========================================");
Serial.println(" LEGO GameBoy Hardware Test Tool");
Serial.println("========================================\n");
// Display
pinMode(TFT_BL, OUTPUT);
digitalWrite(TFT_BL, HIGH);
gfx->begin();
gfx->invertDisplay(true);
gfx->fillScreen(BLACK);
Serial.println("✓ Display initialized");
// Hardware Init
setupButtons();
setupPotis();
setupAudio();
setupNFC();
setupSD();
Serial.println("\n========================================");
Serial.println(" All systems ready!");
Serial.println("========================================\n");
drawUI();
}
// ===== MAIN LOOP =====
void loop() {
// Read Potentiometers
int volRaw = analogRead(POT_VOLUME);
int brightRaw = analogRead(POT_BRIGHT);
volumePercent = map(volRaw, 0, 4095, 0, 100);
brightnessPercent = map(brightRaw, 0, 4095, 0, 100);
// Set Brightness
int blValue = map(brightnessPercent, 0, 100, 0, 255);
analogWrite(TFT_BL, blValue);
// Read NFC every 2 seconds
static unsigned long lastNFCRead = 0;
if (millis() - lastNFCRead > 2000) {
readNFC();
lastNFCRead = millis();
}
// Play Chiptune
if (millis() - lastNoteTime > noteDurations[currentNote]) {
if (melody[currentNote] > 0) {
playTone(melody[currentNote], noteDurations[currentNote]);
}
currentNote = (currentNote + 1) % 16;
lastNoteTime = millis();
}
// Update Display every 100ms
static unsigned long lastUpdate = 0;
if (millis() - lastUpdate > 100) {
drawUI();
lastUpdate = millis();
}
}Danach auf den Haken zum Überpüfen klicken.
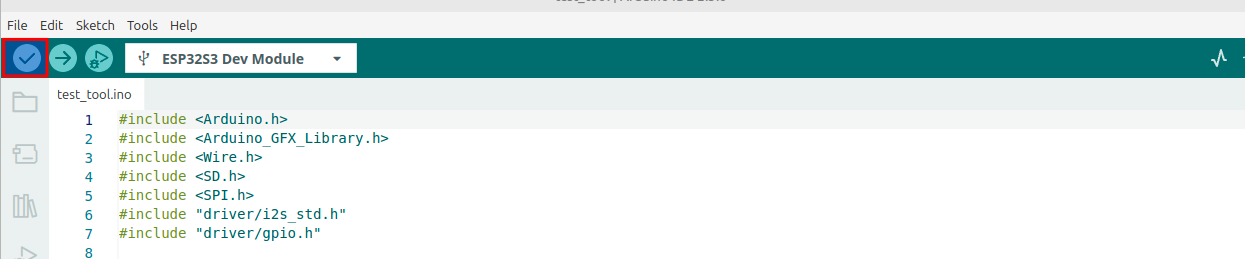
Nun kompiliert er
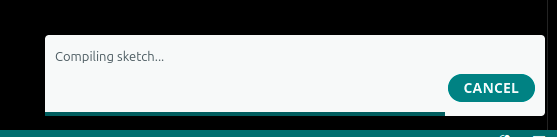
Wenn fertig steht in der Ausgabe wie viel Speicher benutzt wird.
Der Sketch verwendet 483199 Bytes (36%) des Programmspeicherplatzes. Das Maximum sind 1310720 Bytes.
Globale Variablen verwenden 22984 Bytes (7%) des dynamischen Speichers, 304696 Bytes für lokale Variablen verbleiben. Das Maximum sind 327680 Bytes.
Nun können wir das auf den ESP32 hochladen mit dem Pfeil nach recht Button
