# Lego Gameboy mit Funktion

# Einleitung


# Die Komponenten

Beschreibung:

Was wird alles benötigt

<table border="1" id="bkmrk-name-funktion-shop-u" style="border-collapse: collapse; width: 100%; height: 1449.13px;"><colgroup><col style="width: 33.3731%;"></col><col style="width: 33.3731%;"></col><col style="width: 16.6865%;"></col><col style="width: 8.34327%;"></col><col style="width: 8.34327%;"></col></colgroup><tbody><tr style="height: 29.7969px;"><td style="height: 29.7969px;">**Name**</td><td style="height: 29.7969px;">**Funktion**</td><td style="height: 29.7969px;">**Shop URL**</td><td style="height: 29.7969px;">**Bild**</td><td style="height: 29.7969px;">**Anzahl**</td></tr><tr style="height: 57.7812px;"><td style="height: 57.7812px;">Lego Gameboy</td><td style="height: 57.7812px;">Das Gehäuse</td><td style="height: 57.7812px;">[Gameboy Shop URL](https://www.lego.com/de-de/product/game-boy-72046?age-gate=grown_up)</td><td style="height: 57.7812px;">  
</td><td style="height: 57.7812px;">1</td></tr><tr style="height: 72.2969px;"><td style="height: 72.2969px;">Kupferdraht</td><td style="height: 72.2969px;">Verbindungen für die Buttons, Soundchip, NFC, und Potis</td><td style="height: 72.2969px;">[Amazon Shop](https://www.amazon.de/dp/B0F6Y1HVM9?ref=fed_asin_title)

</td><td style="height: 72.2969px;">[![image.png](https://wiki.hacker-net.de/uploads/images/gallery/2025-10/scaled-1680-/AXv1vvwLs0gwV1Xv-image.png)](https://wiki.hacker-net.de/uploads/images/gallery/2025-10/AXv1vvwLs0gwV1Xv-image.png)

</td><td style="height: 72.2969px;">1</td></tr><tr style="height: 69.625px;"><td style="height: 69.625px;">Waveshare 2inch ESP32-S3 Display Development Board, 240x320</td><td style="height: 69.625px;">Display mit SD Card Bat und ESP32 mit GPIO PINS</td><td style="height: 69.625px;">[Amazon Shop](https://www.amazon.de/dp/B0DTYVBLM8?ref=fed_asin_title)

</td><td style="height: 69.625px;">[![image.png](https://wiki.hacker-net.de/uploads/images/gallery/2025-10/scaled-1680-/jfLUeaGKD6QONN2D-image.png)](https://wiki.hacker-net.de/uploads/images/gallery/2025-10/jfLUeaGKD6QONN2D-image.png)

</td><td style="height: 69.625px;">1</td></tr><tr style="height: 143.297px;"><td style="height: 143.297px;">Aideepen 2 Stück PN532 NFC NXP RFID-Modul V3 Kit Reader</td><td style="height: 143.297px;">NFC Reader</td><td style="height: 143.297px;">[Amazon Shop](https://www.amazon.de/dp/B0B1QB4347?ref=fed_asin_title)

</td><td style="height: 143.297px;">[![image.png](https://wiki.hacker-net.de/uploads/images/gallery/2025-10/scaled-1680-/aAAXT69sg76VpE27-image.png)
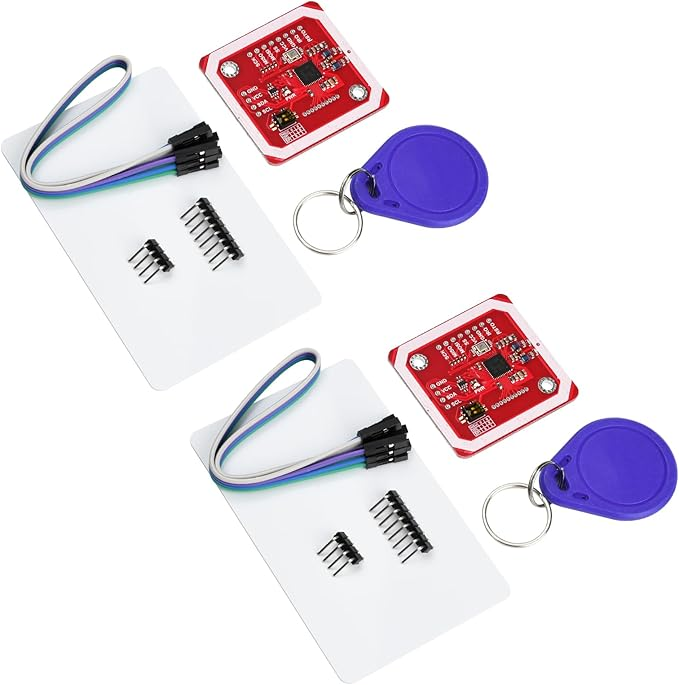
](https://wiki.hacker-net.de/uploads/images/gallery/2025-10/aAAXT69sg76VpE27-image.png)

</td><td style="height: 143.297px;">1

</td></tr><tr style="height: 157.266px;"><td style="height: 157.266px;">SKULLPAPER® Wasserschiebefolie WEISS für Tintenstrahldrucker - hauchdünn DIY Decal</td><td style="height: 157.266px;">Etiketten Papier für die Spiele Kassetten  
Anzahl unendlich, je nach Anzahl der Spiele</td><td style="height: 157.266px;">[Amazon Shop](https://www.amazon.de/dp/B087PMF69V?ref=fed_asin_title)

</td><td style="height: 157.266px;">[![image.png](https://wiki.hacker-net.de/uploads/images/gallery/2025-10/scaled-1680-/bf8BtkXC0wQZABja-image.png)](https://wiki.hacker-net.de/uploads/images/gallery/2025-10/bf8BtkXC0wQZABja-image.png)

</td><td style="height: 157.266px;">### ∞  


</td></tr><tr style="height: 188.75px;"><td style="height: 188.75px;">EEMB Lithium Polymer Akku 3,7 V 1800mAh 963450 Wiederaufladbarer Lipo-Akku mit JST-Anschluss für VXI Blue</td><td style="height: 188.75px;">Akku halt</td><td style="height: 188.75px;">[Amazon Shop](https://www.amazon.de/dp/B095YC5PW8?ref=fed_asin_title&th=1)

</td><td style="height: 188.75px;">[![image.png](https://wiki.hacker-net.de/uploads/images/gallery/2025-10/scaled-1680-/CdNZxSJCsOAb7q2W-image.png)
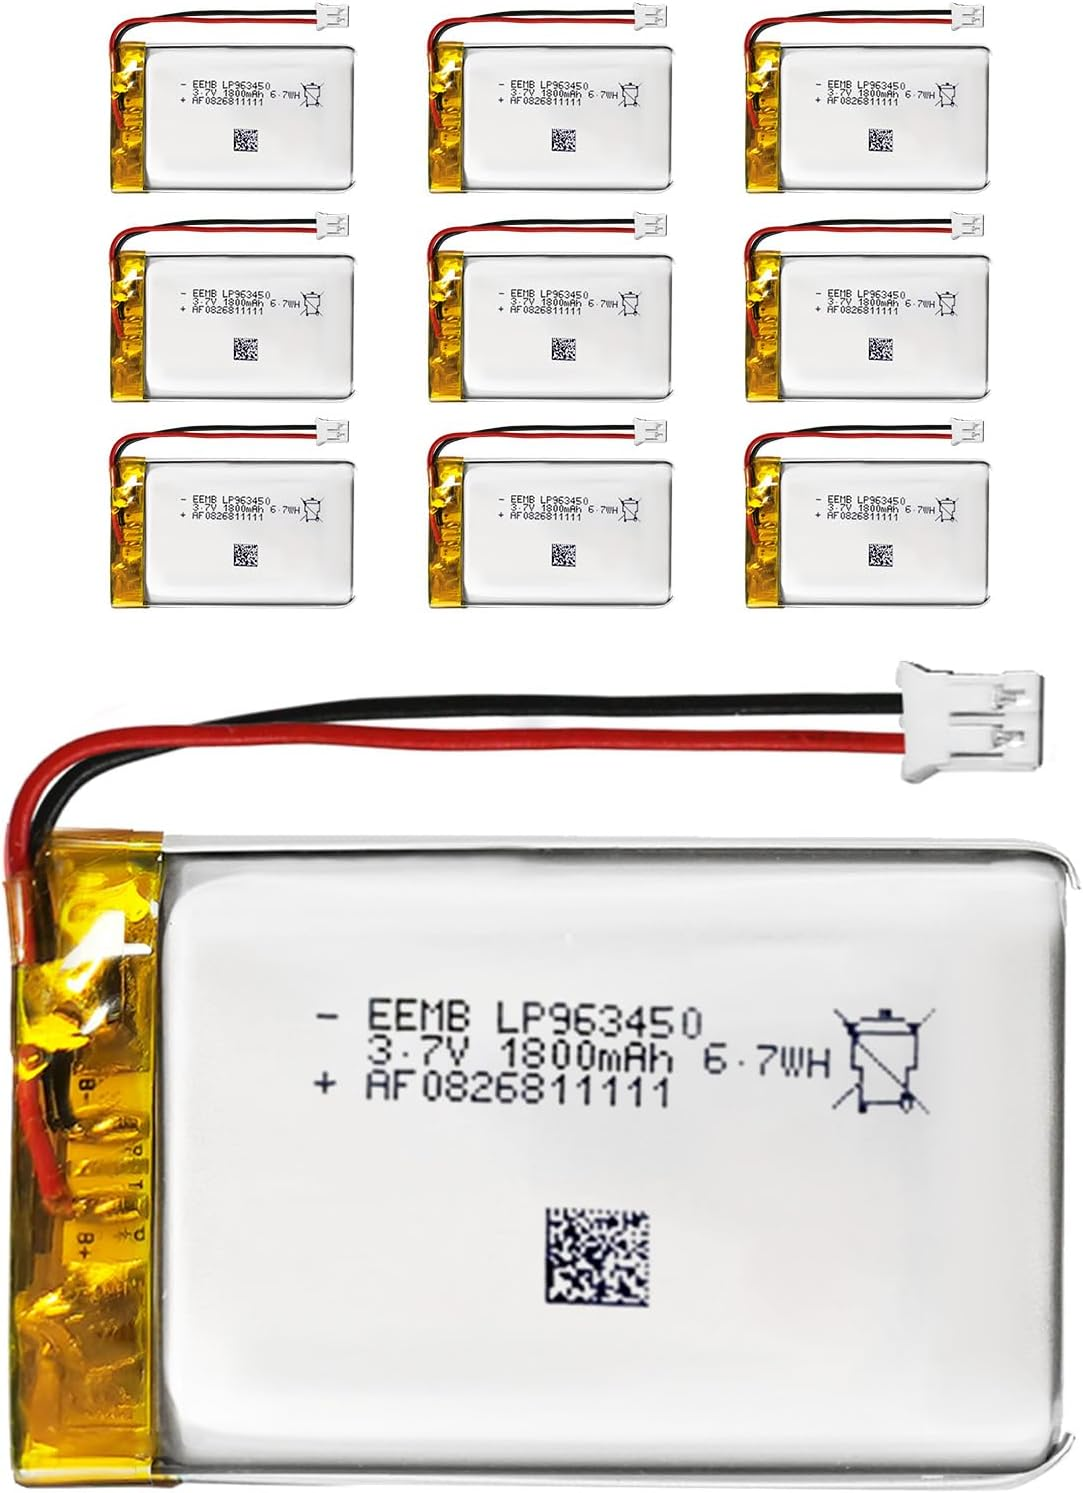
](https://wiki.hacker-net.de/uploads/images/gallery/2025-10/CdNZxSJCsOAb7q2W-image.png)

</td><td style="height: 188.75px;">1

</td></tr><tr style="height: 142.641px;"><td style="height: 142.641px;">Youmile 10 Stück PJ-307 3,5 mm Stereo Audio Klinkenbuchse 5 Pin Leiterplattenmontage Buchse für Audio Kopfhöreradapter für Video/Audiogeräte mit 10 Stück 3,5 mm TRS Steckeradapte</td><td style="height: 142.641px;">3,5 Kopfhörer Klinke mit Lautsprecher unterbrecher wenn Kopfhörer eingesteckt</td><td style="height: 142.641px;">[Amazon Shop](https://www.amazon.de/dp/B09NXNQ9FM?ref=fed_asin_title)

</td><td style="height: 142.641px;">[![image.png](https://wiki.hacker-net.de/uploads/images/gallery/2025-10/scaled-1680-/1n3934xIqqESeS7G-image.png)
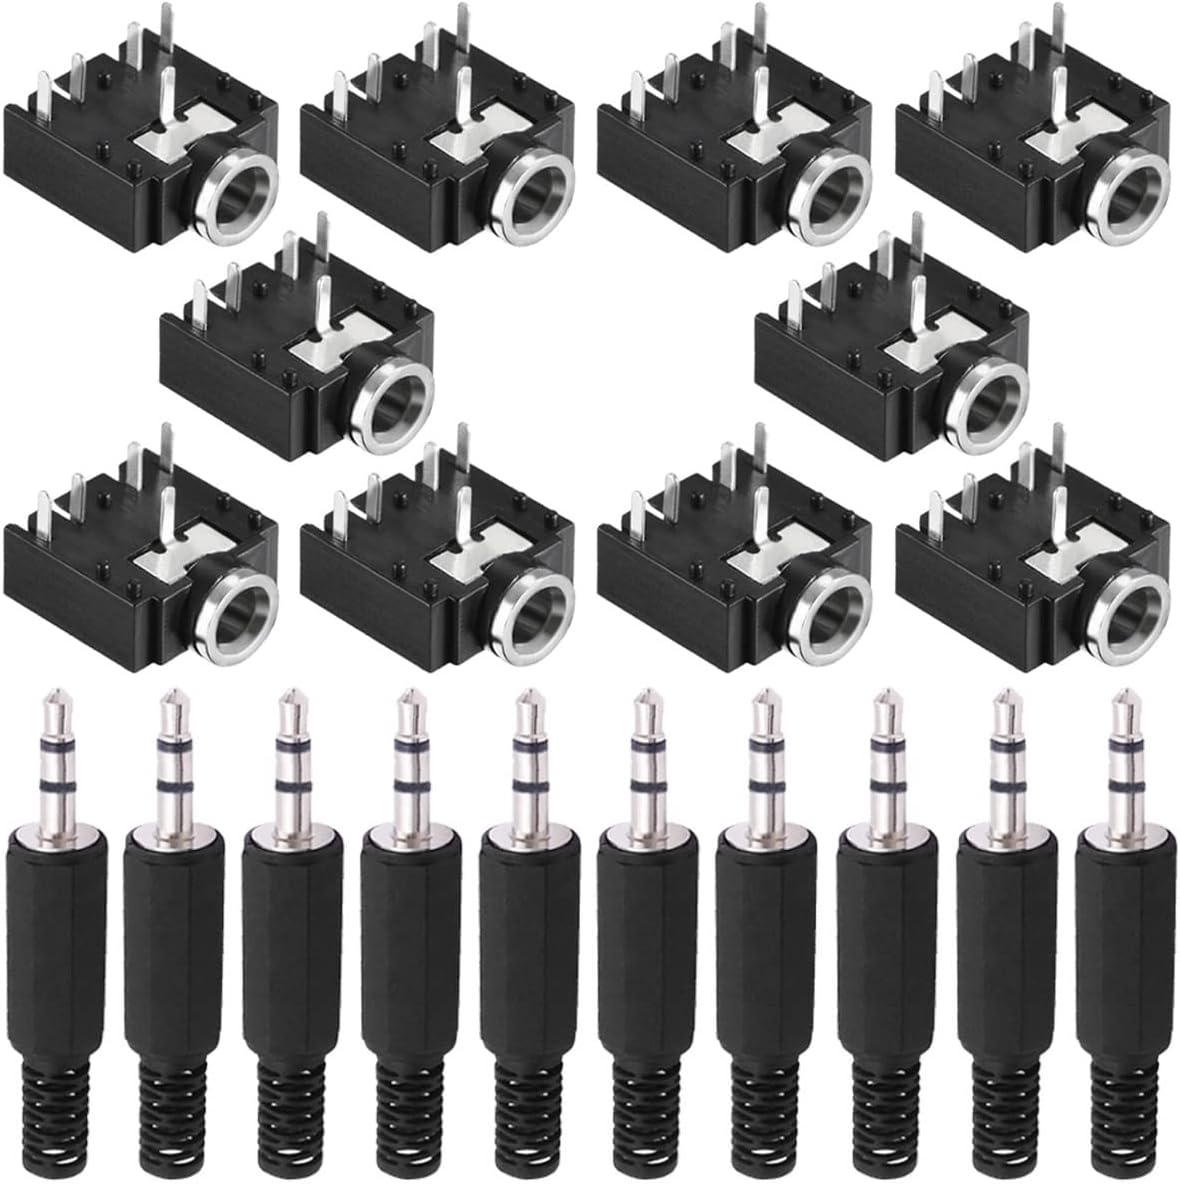
](https://wiki.hacker-net.de/uploads/images/gallery/2025-10/1n3934xIqqESeS7G-image.png)

</td><td style="height: 142.641px;">1

</td></tr><tr style="height: 139.297px;"><td style="height: 139.297px;">MAX98357 I2S 3W Klasse D Audio Verstärkermodul AYWHP 3 PCS DAC Decoder Modul Audio Board I2S DAC Decode</td><td style="height: 139.297px;">Sound Chip</td><td style="height: 139.297px;">[Amazon Shop](https://www.amazon.de/dp/B0F7LGZ4Z3?ref=fed_asin_title)

</td><td style="height: 139.297px;">[![image.png](https://wiki.hacker-net.de/uploads/images/gallery/2025-10/scaled-1680-/sOi4O6YWyo5VQcbr-image.png)
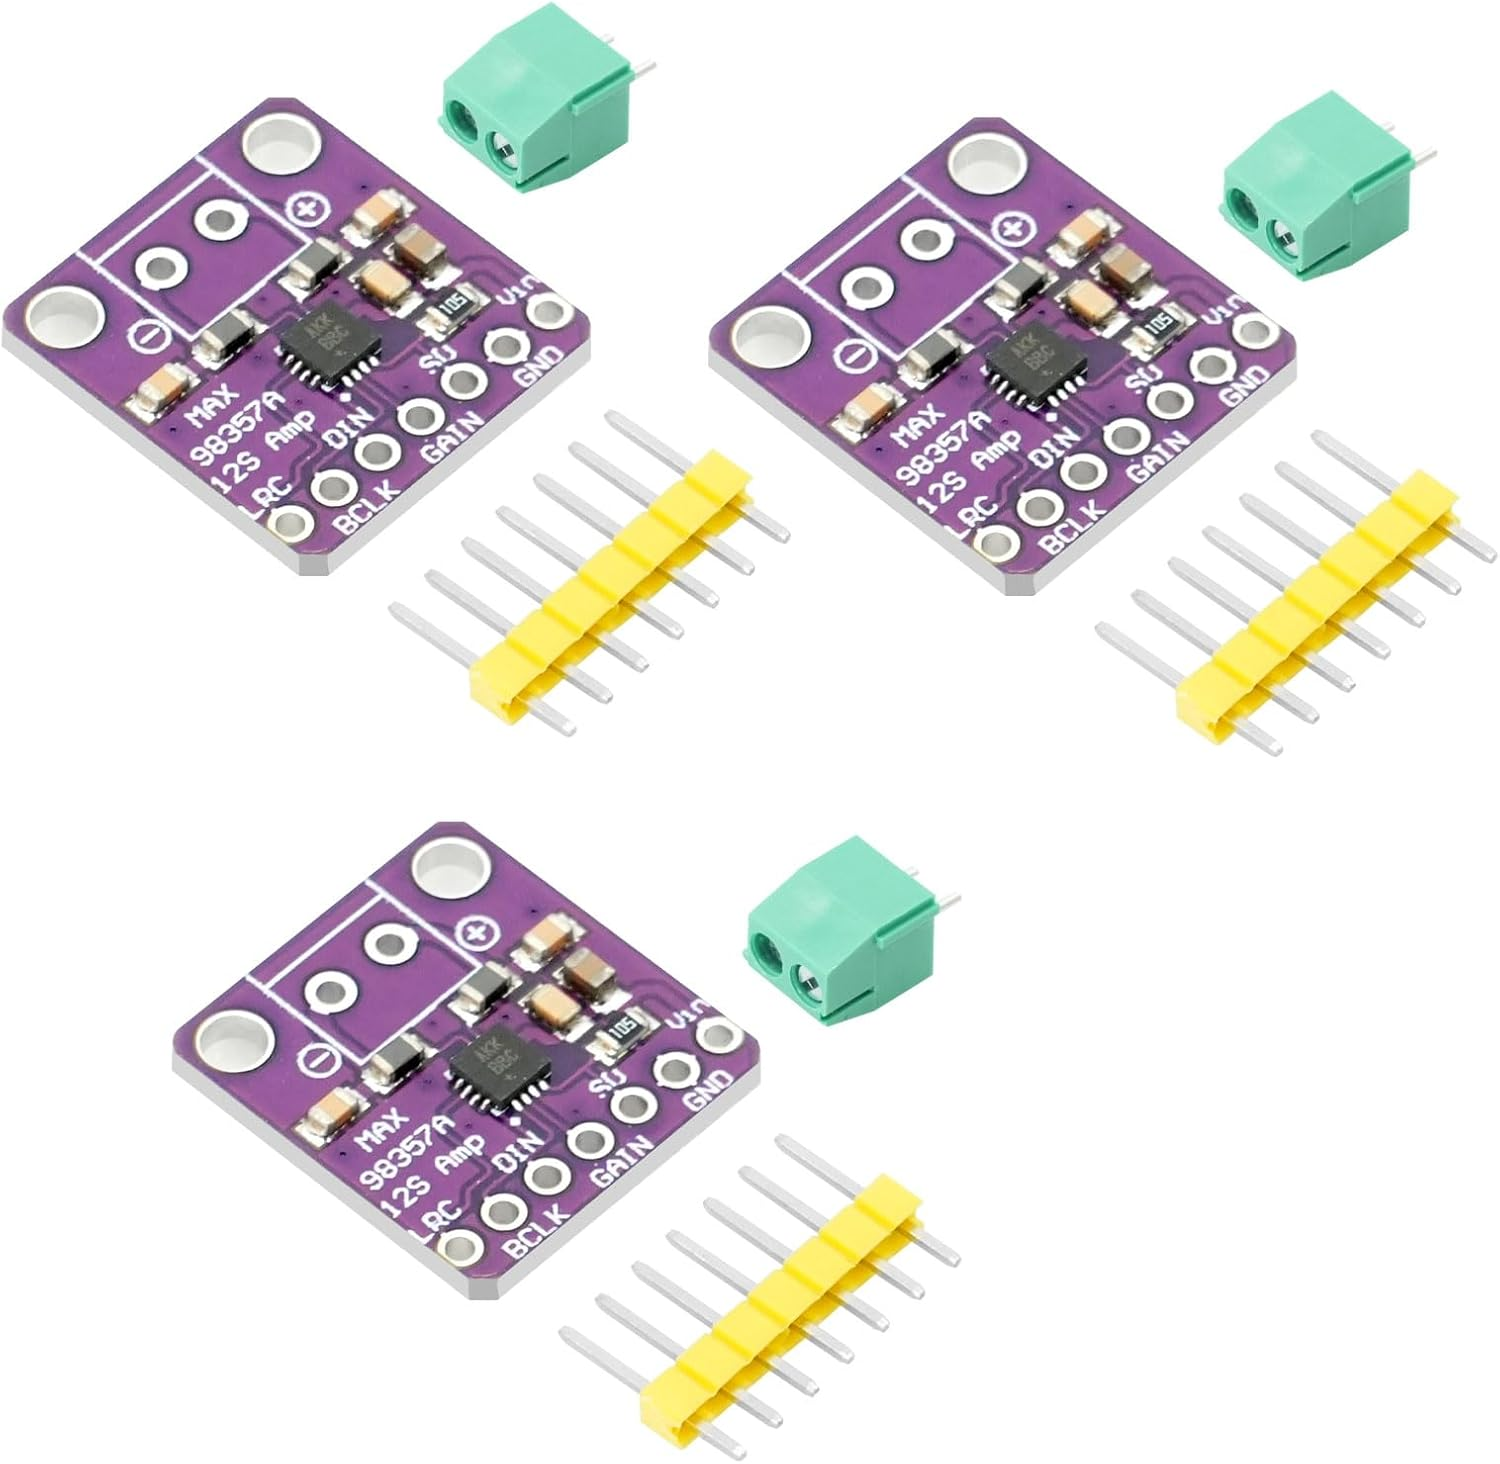
](https://wiki.hacker-net.de/uploads/images/gallery/2025-10/sOi4O6YWyo5VQcbr-image.png)

</td><td style="height: 139.297px;">1

</td></tr><tr style="height: 70.3281px;"><td style="height: 70.3281px;">Poti 13,8 cm Raddurchmesser</td><td style="height: 70.3281px;">Poti für Helligkeit und Lautstärke</td><td style="height: 70.3281px;">[Amazon Shop](https://www.amazon.de/dp/B07WFFQYF4?ref=fed_asin_title)

</td><td style="height: 70.3281px;">[![image.png](https://wiki.hacker-net.de/uploads/images/gallery/2025-10/scaled-1680-/4leT2TODAesm9n6C-image.png)
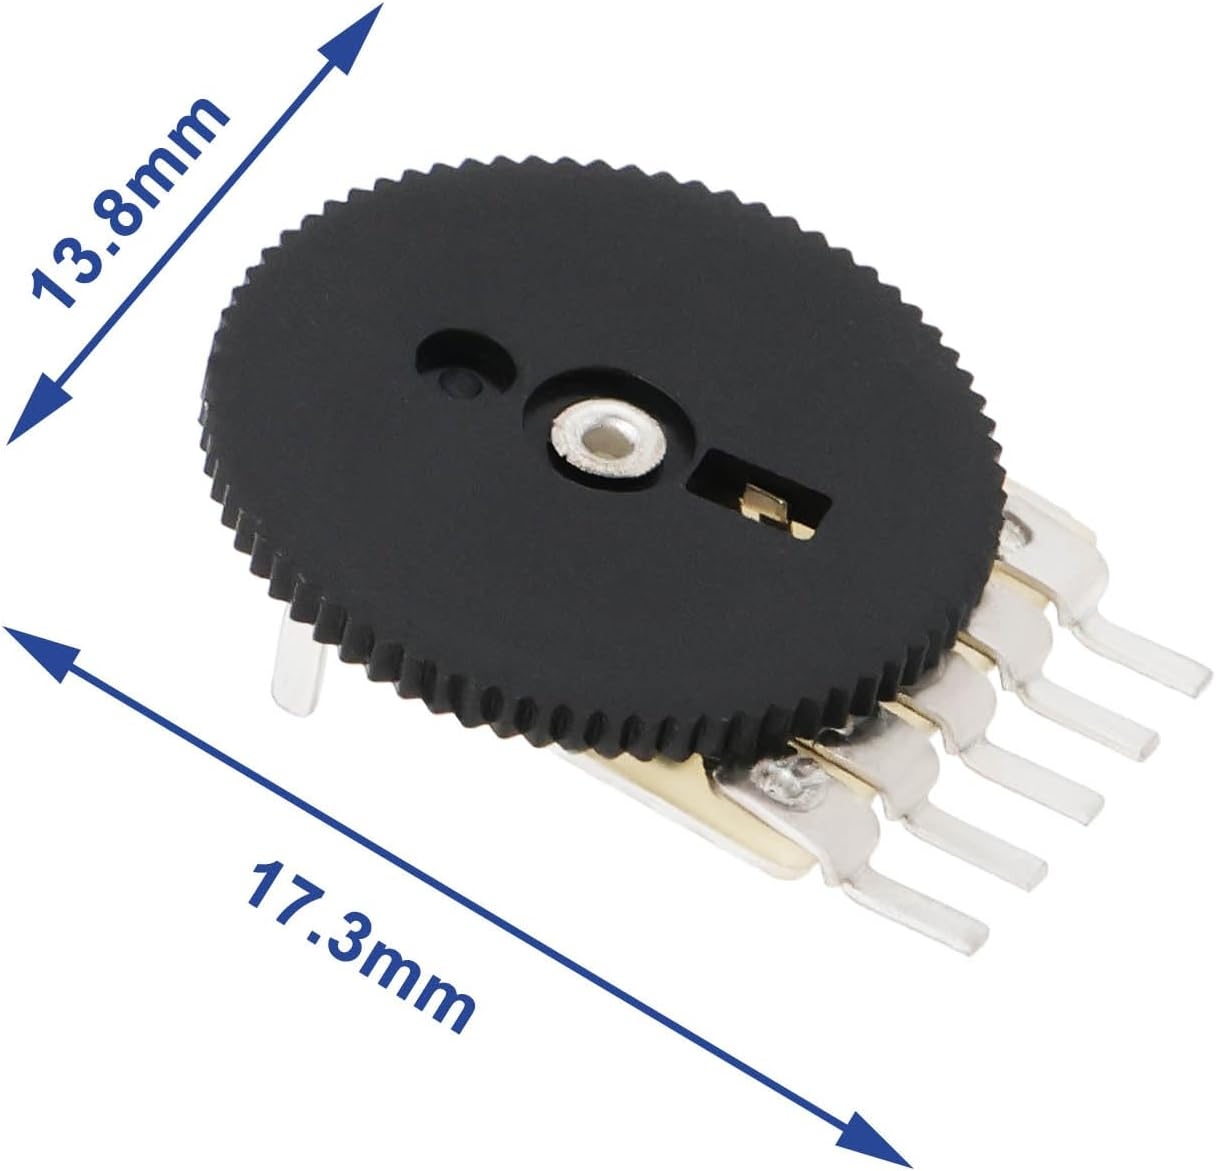
](https://wiki.hacker-net.de/uploads/images/gallery/2025-10/4leT2TODAesm9n6C-image.png)

</td><td style="height: 70.3281px;">2

</td></tr><tr style="height: 96.9844px;"><td style="height: 96.9844px;">200 Stück Miniatur-Mikro Schalter,10 Types 4 Pin Tactile Drucktaster 6x6mm Momentaner taktiler Button Switch berühren Electronic Components,für Panel PCB</td><td style="height: 96.9844px;">Buttons, ne 200 Kiste ist günstiger als einer. Wir brauchen aber nur 8</td><td style="height: 96.9844px;">[Amazon Shop](https://www.amazon.de/dp/B0D7VML9QS?ref=fed_asin_title)

</td><td style="height: 96.9844px;">[![image.png](https://wiki.hacker-net.de/uploads/images/gallery/2025-10/scaled-1680-/tO1oGmsAZx8G7s1e-image.png)
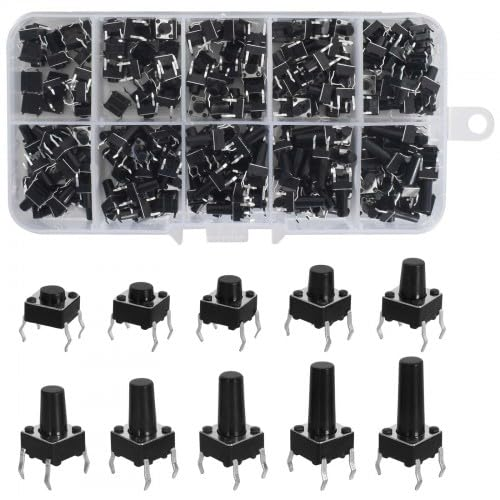
](https://wiki.hacker-net.de/uploads/images/gallery/2025-10/tO1oGmsAZx8G7s1e-image.png)

</td><td style="height: 96.9844px;">8

</td></tr><tr style="height: 59.125px;"><td style="height: 59.125px;">Adafruit PCF8575 I2C 16 GPIO Expander Breakout, Stemma QT/Qwiic, 5611</td><td style="height: 59.125px;">Ein I2C Expander für weitere 16 PINS</td><td style="height: 59.125px;">[Amazon Shop](https://www.amazon.de/dp/B0BPN3BD1Q?ref=fed_asin_title)

</td><td style="height: 59.125px;">[![image.png](https://wiki.hacker-net.de/uploads/images/gallery/2025-11/scaled-1680-/PFff3UL0kEbUqchE-image.png)
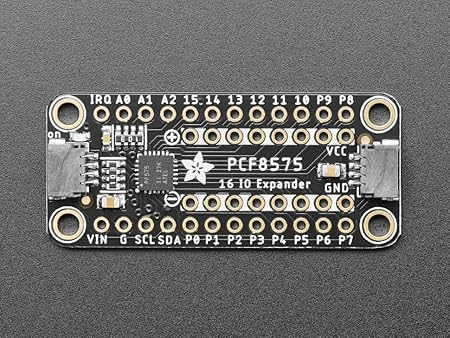
](https://wiki.hacker-net.de/uploads/images/gallery/2025-11/PFff3UL0kEbUqchE-image.png)

</td><td style="height: 59.125px;"></td></tr><tr><td>USB C Buchse</td><td>USB C Buchse</td><td>[Amazon Shop](https://www.amazon.de/KUOQIY-Schnappnut-Schnalle-Typ-C-Buchse-Transparent/dp/B0CZHGWDLJ/ref=sxin_14_pa_sp_search_thematic_sspa?content-id=amzn1.sym.d0f576b8-b33f-4e73-b939-5a8e1e8f8f52%3Aamzn1.sym.d0f576b8-b33f-4e73-b939-5a8e1e8f8f52&crid=2XVRQLBWAITI&cv_ct_cx=usb%2Bbuchse%2Bmit%2Bpin&keywords=usb%2Bbuchse%2Bmit%2Bpin&pd_rd_i=B0CZHGWDLJ&pd_rd_r=7d5a2154-f867-4ead-87ab-f9705bac080e&pd_rd_w=nnk2C&pd_rd_wg=witKd&pf_rd_p=d0f576b8-b33f-4e73-b939-5a8e1e8f8f52&pf_rd_r=CP2KS6E2FS07HBS73DQD&qid=1764711324&sbo=RZvfv%2F%2FHxDF%2BO5021pAnSA%3D%3D&sprefix=usb%2Bbuchse%2Bmit%2Bpin%2Caps%2C115&sr=1-20-697816f9-1d14-47e9-bd0d-1a95e9f140b6-spons&xpid=rvcG2VLtDTmQo&aref=F9VrxMlzaz&sp_csd=d2lkZ2V0TmFtZT1zcF9zZWFyY2hfdGhlbWF0aWM&th=1)

</td><td>[![image.png](https://wiki.hacker-net.de/uploads/images/gallery/2025-12/scaled-1680-/UTzpybCtvuuCt83N-image.png)
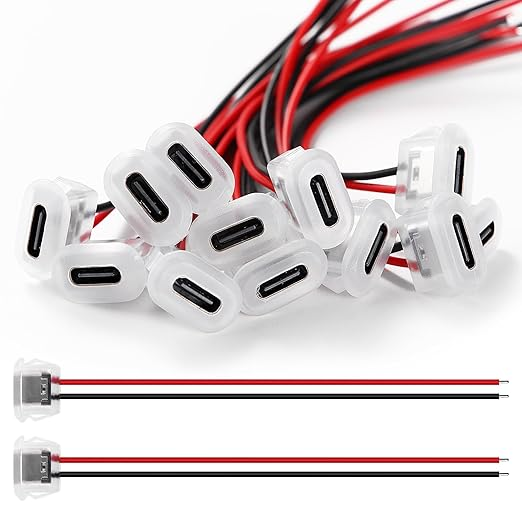
](https://wiki.hacker-net.de/uploads/images/gallery/2025-12/UTzpybCtvuuCt83N-image.png)

</td><td></td></tr><tr style="height: 147.359px;"><td style="height: 147.359px;">3D File für Display</td><td style="height: 147.359px;">Die Datei ist selbst erstellt aus lDraw File 42205 und dem Display Case von Benutzer: [https://www.printables.com/model/1188149-enclosure-for-esp32-s3-touch-lcd-2/files](https://www.printables.com/model/1188149-enclosure-for-esp32-s3-touch-lcd-2/files)
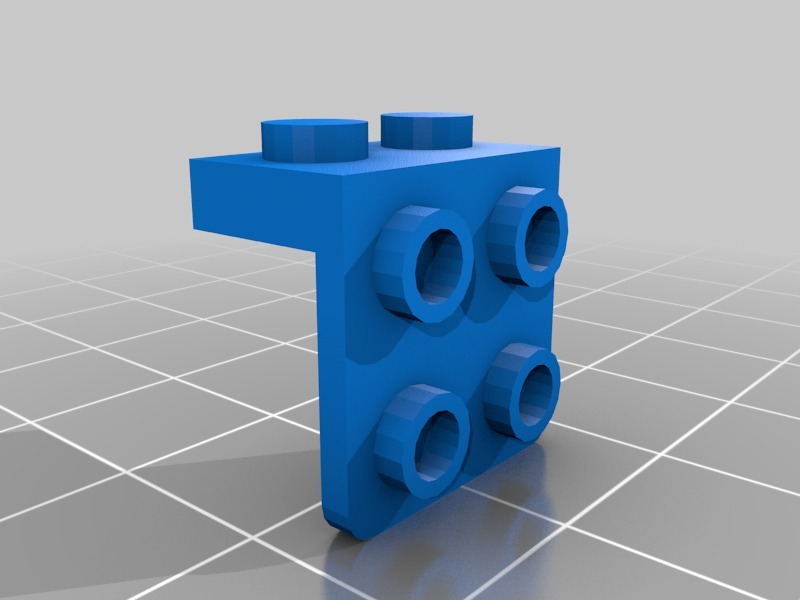
</td><td style="height: 147.359px;"></td><td style="height: 147.359px;"></td><td style="height: 147.359px;"></td></tr><tr style="height: 74.5781px;"><td style="height: 74.5781px;">3D File USB C Buchse</td><td style="height: 74.5781px;">[https://www.thingiverse.com/thing:6932136](https://www.thingiverse.com/thing:6932136)

</td><td style="height: 74.5781px;"></td><td style="height: 74.5781px;">[![image.png](https://wiki.hacker-net.de/uploads/images/gallery/2025-12/scaled-1680-/F0crhZiKerEtirRt-image.png)](https://wiki.hacker-net.de/uploads/images/gallery/2025-12/F0crhZiKerEtirRt-image.png)
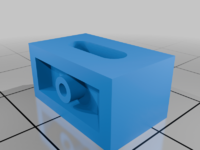
</td><td style="height: 74.5781px;"></td></tr><tr><td>Lego Brick for Power Schalter</td><td>[https://www.thingiverse.com/thing:3419081](https://www.thingiverse.com/thing:3419081)

</td><td></td><td>[![image.png](https://wiki.hacker-net.de/uploads/images/gallery/2025-12/scaled-1680-/7vyaCqeaOVIf4fGr-image.png)](https://wiki.hacker-net.de/uploads/images/gallery/2025-12/7vyaCqeaOVIf4fGr-image.png)

</td><td></td></tr></tbody></table>

**Werkzeuge**

<table border="1" id="bkmrk-name-verwendung-link" style="border-collapse: collapse; width: 100%; height: 135.969px;"><colgroup><col style="width: 33.3333%;"></col><col style="width: 33.3333%;"></col><col style="width: 33.3333%;"></col></colgroup><tbody><tr style="height: 29.7969px;"><td style="height: 29.7969px;">**Name**</td><td style="height: 29.7969px;">**Verwendung**</td><td style="height: 29.7969px;">**Links**</td></tr><tr style="height: 52.1875px;"><td style="height: 52.1875px;">Flussmittelstift</td><td style="height: 52.1875px;">Damit das Lötzinn besser auf den Kontakten haftet</td><td style="height: 52.1875px;">[Amazon Link](https://www.amazon.de/STANNOL-830322-Flussmittelstift-Typ-X32-10I/dp/B002BZFXOK/ref=sr_1_4?crid=1DFJXOIAUWH3N&dib=eyJ2IjoiMSJ9.CyWF_cbaKKnBc1I6lp8ELtryz8ReljrRiwQ28r6fWD3RvKEtrN2ZWxWL-RqLZY0cj90c8IOPXulrmmIeVPWeV1bIg7MH1zmw68vtiYdeHI9ZAde1Kyo2hohfra9JGJGIc4d-4uCd26rRCayFvQQGtuh_av0j2qVo-9ADixLK7vzlT6XhzhqXay6uJLI8O3uWKmXZoSy1kapO5hhwoND-VW63euC7CRyZM5lvJxV53Tc.VbuZhC_oqJ07hDxHGe0Y72yAqRiSxlvLg-O5uHuXzSM&dib_tag=se&keywords=flussmittel+stift+no+clean&qid=1761990009&sprefix=flussmittel+stift+clean%2Caps%2C111&sr=8-4&xpid=umCPzh2m8nClR&qty=2)

</td></tr><tr style="height: 24.1875px;"><td style="height: 24.1875px;">Seitenschneider klein</td><td style="height: 24.1875px;">Um Draht etc zu schneiden</td><td style="height: 24.1875px;">[Amazon Link](https://www.amazon.de/gp/product/B09SL2TCH7/ref=ox_sc_act_title_2?smid=A2XY2J3FRQ9IR9)

</td></tr><tr style="height: 29.7969px;"><td style="height: 29.7969px;">Seitenschneider Groß</td><td style="height: 29.7969px;">UM PCB zu Schneiden</td><td style="height: 29.7969px;">[Amazon Link](https://www.amazon.de/gp/product/B0777F3CNC/ref=ox_sc_act_title_3?smid=AQE74BRXILS33)

</td></tr><tr><td>Lötkolbenreiniger</td><td>Besser als die Nassen Schwämme,  
Kein Wasser nötig</td><td>[Amazon Link](https://www.amazon.de/gp/product/B07WCNM7BV/ref=ox_sc_act_title_4?smid=A2DFN3CBLPVJC9&psc=1)

</td></tr><tr><td>Akku Lötkolben ohne Kabel</td><td>Lötkolben ohne Kabel, mal ein Versuch Wert 12-15W, nehmt nicht die spitze Spitze sondern die Abgeflachte die dabei ist</td><td>[Amazon Link](https://www.amazon.de/dp/B0DK13L5PH?ref=fed_asin_title)

</td></tr></tbody></table>

Gameboy / NES Software

<table border="1" id="bkmrk-software-projekt-bes" style="border-collapse: collapse; width: 100%;"><colgroup><col style="width: 33.3333%;"></col><col style="width: 33.3333%;"></col><col style="width: 33.3333%;"></col></colgroup><tbody><tr><td>Software Projekt</td><td>Beschreibung</td><td>Link</td></tr><tr><td>ESP32 Handheld</td><td>ESP32 Nes</td><td>https://www.instructables.com/ESP32-Handheld-Game-Console/</td></tr><tr><td>NesCat ESP32</td><td>Ein ESP32 NES Emualtor</td><td>https://github.com/markoni985/NesCat</td></tr><tr><td>ESP32 Gameboy</td><td>ILI9341 Display Variante</td><td>https://github.com/lualiliu/esp32-gameboy</td></tr></tbody></table>

# Hardware zusammenbau und Testen

### Beschreibung:

Zusammenbau am Steckbrett und Testsoftware.

```
### *** DISPLAY PINS sind intern verbunden, werden hier nur für die Programmierung aufgelistet :**
```
TFT_SCLK  39
TFT_MOSI  38
TFT_MISO  40
TFT_DC    42
TFT_CS    45
TFT_RST   -1
TFT_BL    1
```
Buttons:
UP:     GPIO 2  → GND (mit Pullup)
DOWN:   GPIO 3  → GND
LEFT:   GPIO 4  → GND
RIGHT:  GPIO 5  → GND
A:      GPIO 6  → GND
B:      GPIO 7  → GND
START:  GPIO 8  → GND
SELECT: GPIO 9  → GND
```

### **Potis (10kΩ):**
```
POT_VOLUME: GPIO 10 (Mittelpin), GND + 3.3V
POT_BRIGHT: GPIO 11 (Mittelpin), GND + 3.3V
```

### **MAX98357A Audio:**
```
BCLK: GPIO 12
LRC:  GPIO 13
DIN:  GPIO 14
VIN:  5V oder 3.3V
GND:  GND
```

### **PN532 NFC:**
```
SDA: GPIO 48 (shared mit Touch)
SCL: GPIO 47 (shared mit Touch)
```

### **SD Card:**
```
CS: GPIO 15 (nutzt SPI vom Display)
```

IDE installieren

[Arduino IDE Download](https://www.arduino.cc/en/software/)

Nachdem die IDE installiert müssen wir unser Board auswählen und ein paar Pakete installieren.  
Ert board auswählen

[![image.png](https://wiki.hacker-net.de/uploads/images/gallery/2025-10/scaled-1680-/lIiulpWT4XUWO0WS-image.png)](https://wiki.hacker-net.de/uploads/images/gallery/2025-10/lIiulpWT4XUWO0WS-image.png)

Dann werden wir gefragt ob wir das Paket für ESP32 installieren wollen, da klciken wir auf yes

[![image.png](https://wiki.hacker-net.de/uploads/images/gallery/2025-10/scaled-1680-/fKaIw1P7SqaobFDO-image.png)](https://wiki.hacker-net.de/uploads/images/gallery/2025-10/fKaIw1P7SqaobFDO-image.png)

Dazu klicken wir auf das Library Manager Symbol

[![image.png](https://wiki.hacker-net.de/uploads/images/gallery/2025-10/scaled-1680-/dZVh3UbQmDcwROMl-image.png)](https://wiki.hacker-net.de/uploads/images/gallery/2025-10/dZVh3UbQmDcwROMl-image.png)

Geben als Suchbegriff folgende namen ein und installieren diese.  
Hintereinander eingeben, natürlich

<table border="1" id="bkmrk-library-name-suchbeg" style="border-collapse: collapse; width: 100%; height: 59.5938px;"><colgroup><col style="width: 33.3731%;"></col><col style="width: 33.3731%;"></col><col style="width: 33.3731%;"></col></colgroup><tbody><tr style="height: 29.7969px;"><td style="height: 29.7969px;">**Library Name**</td><td style="height: 29.7969px;">**Suchbegriff**</td><td style="height: 29.7969px;">**Bild**</td></tr><tr style="height: 29.7969px;"><td style="height: 29.7969px;">GFX Library for Arduino</td><td style="height: 29.7969px;">\*arduino\*gfx\*</td><td style="height: 29.7969px;">[![image.png](https://wiki.hacker-net.de/uploads/images/gallery/2025-10/scaled-1680-/d17EMtu6FSHn5UjR-image.png)](https://wiki.hacker-net.de/uploads/images/gallery/2025-10/d17EMtu6FSHn5UjR-image.png)

</td></tr><tr><td>Adafruit PN532</td><td>Adafruit PN532</td><td>[![image.png](https://wiki.hacker-net.de/uploads/images/gallery/2025-11/scaled-1680-/2psD2VidlBeYSAW7-image.png)](https://wiki.hacker-net.de/uploads/images/gallery/2025-11/2psD2VidlBeYSAW7-image.png)

</td></tr></tbody></table>

Nun das Testprogramm einfügen

  
Testprogramm

```
#include <Arduino.h>
#include <Arduino_GFX_Library.h>
#include <Wire.h>
#include <SD.h>
#include <SPI.h>
#include <driver/i2s.h>

// ===== DISPLAY PINS =====
#define TFT_SCLK  39
#define TFT_MOSI  38
#define TFT_MISO  40
#define TFT_DC    42
#define TFT_CS    45
#define TFT_RST   -1
#define TFT_BL    1

// ===== BUTTON PINS (mit INPUT_PULLUP) =====
#define BTN_UP      2
#define BTN_DOWN    3
#define BTN_LEFT    4
#define BTN_RIGHT   5
#define BTN_A       6
#define BTN_B       7
#define BTN_START   8
#define BTN_SELECT  9

// ===== POTENTIOMETER (ADC) =====
#define POT_VOLUME  10  // ADC für Lautstärke
#define POT_BRIGHT  11  // ADC für Helligkeit

// ===== I2S AUDIO (MAX98357A) =====
#define I2S_BCLK    12
#define I2S_LRC     13
#define I2S_DOUT    14
#define I2S_NUM     I2S_NUM_0

// ===== NFC (PN532 auf Touch-I2C) =====
#define NFC_SDA     48
#define NFC_SCL     47
#define PN532_I2C_ADDRESS 0x24

// ===== SD CARD =====
#define SD_CS       15

// ===== DISPLAY =====
#define SCREEN_WIDTH  240
#define SCREEN_HEIGHT 320

Arduino_DataBus *bus = new Arduino_ESP32SPI(TFT_DC, TFT_CS, TFT_SCLK, TFT_MOSI, TFT_MISO);
Arduino_GFX *gfx = new Arduino_ST7789(bus, TFT_RST, 0, true, SCREEN_WIDTH, SCREEN_HEIGHT);

// ===== GLOBALE VARIABLEN =====
int volumePercent = 50;
int brightnessPercent = 80;
String nfcUID = "Waiting...";
bool sdCardOK = false;

// ===== CHIPTUNE FREQUENCY TABLE =====
const int NOTE_C4 = 262;
const int NOTE_D4 = 294;
const int NOTE_E4 = 330;
const int NOTE_F4 = 349;
const int NOTE_G4 = 392;
const int NOTE_A4 = 440;
const int NOTE_B4 = 494;
const int NOTE_C5 = 523;

int melody[] = {NOTE_E4, NOTE_E4, 0, NOTE_E4, 0, NOTE_C4, NOTE_E4, 0, 
                NOTE_G4, 0, 0, 0, NOTE_G4, 0, 0, 0};
int noteDurations[] = {200, 200, 200, 200, 200, 200, 200, 200,
                       200, 200, 200, 200, 200, 200, 200, 200};
int currentNote = 0;
unsigned long lastNoteTime = 0;

// ===== SETUP I2S AUDIO =====
void setupAudio() {
  i2s_config_t i2s_config = {
    .mode = (i2s_mode_t)(I2S_MODE_MASTER | I2S_MODE_TX),
    .sample_rate = 16000,
    .bits_per_sample = I2S_BITS_PER_SAMPLE_16BIT,
    .channel_format = I2S_CHANNEL_FMT_ONLY_RIGHT,
    .communication_format = I2S_COMM_FORMAT_I2S_MSB,
    .intr_alloc_flags = ESP_INTR_FLAG_LEVEL1,
    .dma_buf_count = 8,
    .dma_buf_len = 64,
    .use_apll = false,
    .tx_desc_auto_clear = true,
    .fixed_mclk = 0
  };
  
  i2s_pin_config_t pin_config = {
    .bck_io_num = I2S_BCLK,
    .ws_io_num = I2S_LRC,
    .data_out_num = I2S_DOUT,
    .data_in_num = I2S_PIN_NO_CHANGE
  };
  
  i2s_driver_install(I2S_NUM, &i2s_config, 0, NULL);
  i2s_set_pin(I2S_NUM, &pin_config);
  Serial.println("✓ Audio initialized");
}

// ===== PLAY TONE =====
void playTone(int frequency, int duration) {
  if (frequency == 0) {
    delay(duration);
    return;
  }
  
  const int sampleRate = 16000;
  const int samples = (sampleRate * duration) / 1000;
  int16_t sample;
  size_t bytes_written;
  
  float amplitude = (volumePercent / 100.0) * 10000;
  
  for (int i = 0; i < samples; i++) {
    sample = (int16_t)(amplitude * sin(2.0 * PI * frequency * i / sampleRate));
    i2s_write(I2S_NUM, &sample, sizeof(sample), &bytes_written, portMAX_DELAY);
  }
}

// ===== SETUP BUTTONS =====
void setupButtons() {
  pinMode(BTN_UP, INPUT_PULLUP);
  pinMode(BTN_DOWN, INPUT_PULLUP);
  pinMode(BTN_LEFT, INPUT_PULLUP);
  pinMode(BTN_RIGHT, INPUT_PULLUP);
  pinMode(BTN_A, INPUT_PULLUP);
  pinMode(BTN_B, INPUT_PULLUP);
  pinMode(BTN_START, INPUT_PULLUP);
  pinMode(BTN_SELECT, INPUT_PULLUP);
  Serial.println("✓ Buttons initialized");
}

// ===== SETUP POTIS =====
void setupPotis() {
  pinMode(POT_VOLUME, INPUT);
  pinMode(POT_BRIGHT, INPUT);
  analogSetAttenuation(ADC_11db);
  Serial.println("✓ Potentiometers initialized");
}

// ===== SETUP NFC =====
void setupNFC() {
  Wire.begin(NFC_SDA, NFC_SCL);
  Serial.println("✓ NFC I2C initialized");
}

// ===== READ NFC (vereinfacht) =====
void readNFC() {
  Wire.beginTransmission(PN532_I2C_ADDRESS);
  if (Wire.endTransmission() == 0) {
    nfcUID = "PN532 Found!";
  } else {
    nfcUID = "No card...";
  }
}

// ===== SETUP SD CARD =====
void setupSD() {
  pinMode(SD_CS, OUTPUT);
  digitalWrite(SD_CS, HIGH);
  
  if (SD.begin(SD_CS, SPI, 4000000)) {
    Serial.println("✓ SD Card initialized");
    sdCardOK = true;
    testSDCard();
  } else {
    Serial.println("❌ SD Card init failed");
    sdCardOK = false;
  }
}

// ===== TEST SD CARD =====
void testSDCard() {
  File file = SD.open("/test.txt", FILE_WRITE);
  if (file) {
    file.println("LEGO GameBoy Hardware Test");
    file.close();
    Serial.println("✓ SD Write OK");
    
    file = SD.open("/test.txt");
    if (file) {
      String content = file.readString();
      file.close();
      if (content.indexOf("LEGO") >= 0) {
        Serial.println("✓ SD Read OK");
        sdCardOK = true;
      }
    }
  } else {
    sdCardOK = false;
  }
}

// ===== DRAW BUTTON =====
void drawButton(int x, int y, int w, int h, String label, bool pressed) {
  uint16_t color = pressed ? RED : 0x4208;
  gfx->fillRoundRect(x, y, w, h, 4, color);
  gfx->drawRoundRect(x, y, w, h, 4, WHITE);
  
  gfx->setTextColor(WHITE);
  gfx->setTextSize(1);
  int16_t x1, y1;
  uint16_t tw, th;
  gfx->getTextBounds(label.c_str(), 0, 0, &x1, &y1, &tw, &th);
  gfx->setCursor(x + (w - tw) / 2, y + (h - th) / 2);
  gfx->print(label);
}

// ===== DRAW BAR =====
void drawBar(int x, int y, int w, int h, int percent, String label) {
  gfx->setTextColor(WHITE);
  gfx->setTextSize(1);
  gfx->setCursor(x, y - 12);
  gfx->print(label + ": " + String(percent) + "%");
  
  gfx->drawRect(x, y, w, h, WHITE);
  int fillWidth = (w - 4) * percent / 100;
  gfx->fillRect(x + 2, y + 2, fillWidth, h - 4, GREEN);
}

// ===== DRAW UI =====
void drawUI() {
  gfx->fillScreen(BLACK);
  
  // Title
  gfx->setTextColor(CYAN);
  gfx->setTextSize(2);
  gfx->setCursor(10, 5);
  gfx->print("HW Test Tool");
  
  // D-Pad
  bool up = !digitalRead(BTN_UP);
  bool down = !digitalRead(BTN_DOWN);
  bool left = !digitalRead(BTN_LEFT);
  bool right = !digitalRead(BTN_RIGHT);
  
  drawButton(40, 50, 25, 25, "^", up);      // UP
  drawButton(40, 100, 25, 25, "v", down);   // DOWN
  drawButton(15, 75, 25, 25, "<", left);    // LEFT
  drawButton(65, 75, 25, 25, ">", right);   // RIGHT
  
  // A, B Buttons
  bool a = !digitalRead(BTN_A);
  bool b = !digitalRead(BTN_B);
  drawButton(180, 75, 30, 30, "A", a);
  drawButton(140, 75, 30, 30, "B", b);
  
  // Start, Select
  bool start = !digitalRead(BTN_START);
  bool select = !digitalRead(BTN_SELECT);
  drawButton(130, 115, 45, 20, "START", start);
  drawButton(180, 115, 45, 20, "SEL", select);
  
  // Volume Bar
  drawBar(10, 150, 220, 20, volumePercent, "Volume");
  
  // Brightness Bar
  drawBar(10, 185, 220, 20, brightnessPercent, "Bright");
  
  // NFC Status
  gfx->setTextColor(YELLOW);
  gfx->setTextSize(1);
  gfx->setCursor(10, 220);
  gfx->print("NFC: " + nfcUID);
  
  // SD Card Status
  gfx->setCursor(10, 235);
  gfx->setTextColor(sdCardOK ? GREEN : RED);
  gfx->print("SD Card: ");
  gfx->print(sdCardOK ? "OK" : "FAIL");
  
  // Music Status
  gfx->setTextColor(MAGENTA);
  gfx->setCursor(10, 250);
  gfx->print("Music: Playing...");
  
  // Instructions
  gfx->setTextColor(WHITE);
  gfx->setTextSize(1);
  gfx->setCursor(10, 280);
  gfx->print("Test all buttons!");
  gfx->setCursor(10, 295);
  gfx->print("Turn potentiometers!");
}

// ===== SETUP =====
void setup() {
  Serial.begin(115200);
  delay(1000);
  
  Serial.println("\n========================================");
  Serial.println("  LEGO GameBoy Hardware Test Tool");
  Serial.println("========================================\n");
  
  // Display
  pinMode(TFT_BL, OUTPUT);
  digitalWrite(TFT_BL, HIGH);
  gfx->begin();
  gfx->invertDisplay(true);
  gfx->fillScreen(BLACK);
  Serial.println("✓ Display initialized");
  
  // Hardware Init
  setupButtons();
  setupPotis();
  setupAudio();
  setupNFC();
  setupSD();
  
  Serial.println("\n========================================");
  Serial.println("  All systems ready!");
  Serial.println("========================================\n");
  
  drawUI();
}

// ===== MAIN LOOP =====
void loop() {
  // Read Potentiometers
  int volRaw = analogRead(POT_VOLUME);
  int brightRaw = analogRead(POT_BRIGHT);
  
  volumePercent = map(volRaw, 0, 4095, 0, 100);
  brightnessPercent = map(brightRaw, 0, 4095, 0, 100);
  
  // Set Brightness
  int blValue = map(brightnessPercent, 0, 100, 0, 255);
  analogWrite(TFT_BL, blValue);
  
  // Read NFC every 2 seconds
  static unsigned long lastNFCRead = 0;
  if (millis() - lastNFCRead > 2000) {
    readNFC();
    lastNFCRead = millis();
  }
  
  // Play Chiptune
  if (millis() - lastNoteTime > noteDurations[currentNote]) {
    if (melody[currentNote] > 0) {
      playTone(melody[currentNote], noteDurations[currentNote]);
    }
    currentNote = (currentNote + 1) % 16;
    lastNoteTime = millis();
  }
  
  // Update Display every 100ms
  static unsigned long lastUpdate = 0;
  if (millis() - lastUpdate > 100) {
    drawUI();
    lastUpdate = millis();
  }
}
```

Danach auf den Haken zum Überpüfen klicken.

[![image.png](https://wiki.hacker-net.de/uploads/images/gallery/2025-10/scaled-1680-/7MnGhUKIT82XJMdy-image.png)](https://wiki.hacker-net.de/uploads/images/gallery/2025-10/7MnGhUKIT82XJMdy-image.png)

Nun kompiliert er

[![image.png](https://wiki.hacker-net.de/uploads/images/gallery/2025-10/scaled-1680-/XyXvtvQ18JSbHWiI-image.png)](https://wiki.hacker-net.de/uploads/images/gallery/2025-10/XyXvtvQ18JSbHWiI-image.png)

Wenn fertig steht in der Ausgabe wie viel Speicher benutzt wird.

```
Der Sketch verwendet 483199 Bytes (36%) des Programmspeicherplatzes. Das Maximum sind 1310720 Bytes.
Globale Variablen verwenden 22984 Bytes (7%) des dynamischen Speichers, 304696 Bytes für lokale Variablen verbleiben. Das Maximum sind 327680 Bytes.

```

Nun können wir das auf den ESP32 hochladen mit dem Pfeil nach recht Button

[![image.png](https://wiki.hacker-net.de/uploads/images/gallery/2025-10/scaled-1680-/8dSqyGJFPFX96eWm-image.png)](https://wiki.hacker-net.de/uploads/images/gallery/2025-10/8dSqyGJFPFX96eWm-image.png)