# Hardware zusammenbau und Testen

### Beschreibung:

Zusammenbau am Steckbrett und Testsoftware.

```
### *** DISPLAY PINS sind intern verbunden, werden hier nur für die Programmierung aufgelistet :**
```
TFT_SCLK  39
TFT_MOSI  38
TFT_MISO  40
TFT_DC    42
TFT_CS    45
TFT_RST   -1
TFT_BL    1
```
Buttons:
UP:     GPIO 2  → GND (mit Pullup)
DOWN:   GPIO 3  → GND
LEFT:   GPIO 4  → GND
RIGHT:  GPIO 5  → GND
A:      GPIO 6  → GND
B:      GPIO 7  → GND
START:  GPIO 8  → GND
SELECT: GPIO 9  → GND
```

### **Potis (10kΩ):**
```
POT_VOLUME: GPIO 10 (Mittelpin), GND + 3.3V
POT_BRIGHT: GPIO 11 (Mittelpin), GND + 3.3V
```

### **MAX98357A Audio:**
```
BCLK: GPIO 12
LRC:  GPIO 13
DIN:  GPIO 14
VIN:  5V oder 3.3V
GND:  GND
```

### **PN532 NFC:**
```
SDA: GPIO 48 (shared mit Touch)
SCL: GPIO 47 (shared mit Touch)
```

### **SD Card:**
```
CS: GPIO 15 (nutzt SPI vom Display)
```

IDE installieren

[Arduino IDE Download](https://www.arduino.cc/en/software/)

Nachdem die IDE installiert müssen wir unser Board auswählen und ein paar Pakete installieren.  
Ert board auswählen

[![image.png](https://wiki.hacker-net.de/uploads/images/gallery/2025-10/scaled-1680-/lIiulpWT4XUWO0WS-image.png)](https://wiki.hacker-net.de/uploads/images/gallery/2025-10/lIiulpWT4XUWO0WS-image.png)

Dann werden wir gefragt ob wir das Paket für ESP32 installieren wollen, da klciken wir auf yes

[![image.png](https://wiki.hacker-net.de/uploads/images/gallery/2025-10/scaled-1680-/fKaIw1P7SqaobFDO-image.png)](https://wiki.hacker-net.de/uploads/images/gallery/2025-10/fKaIw1P7SqaobFDO-image.png)

Dazu klicken wir auf das Library Manager Symbol

[![image.png](https://wiki.hacker-net.de/uploads/images/gallery/2025-10/scaled-1680-/dZVh3UbQmDcwROMl-image.png)](https://wiki.hacker-net.de/uploads/images/gallery/2025-10/dZVh3UbQmDcwROMl-image.png)

Geben als Suchbegriff folgende namen ein und installieren diese.  
Hintereinander eingeben, natürlich

<table border="1" id="bkmrk-library-name-suchbeg" style="border-collapse: collapse; width: 100%; height: 59.5938px;"><colgroup><col style="width: 33.3731%;"></col><col style="width: 33.3731%;"></col><col style="width: 33.3731%;"></col></colgroup><tbody><tr style="height: 29.7969px;"><td style="height: 29.7969px;">**Library Name**</td><td style="height: 29.7969px;">**Suchbegriff**</td><td style="height: 29.7969px;">**Bild**</td></tr><tr style="height: 29.7969px;"><td style="height: 29.7969px;">GFX Library for Arduino</td><td style="height: 29.7969px;">\*arduino\*gfx\*</td><td style="height: 29.7969px;">[![image.png](https://wiki.hacker-net.de/uploads/images/gallery/2025-10/scaled-1680-/d17EMtu6FSHn5UjR-image.png)
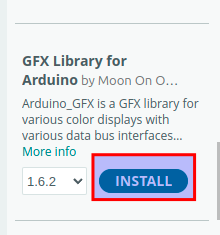
](https://wiki.hacker-net.de/uploads/images/gallery/2025-10/d17EMtu6FSHn5UjR-image.png)

</td></tr><tr><td>Adafruit PN532</td><td>Adafruit PN532</td><td>[![image.png](https://wiki.hacker-net.de/uploads/images/gallery/2025-11/scaled-1680-/2psD2VidlBeYSAW7-image.png)](https://wiki.hacker-net.de/uploads/images/gallery/2025-11/2psD2VidlBeYSAW7-image.png)

</td></tr></tbody></table>

Nun das Testprogramm einfügen

  
Testprogramm

```
#include <Arduino.h>
#include <Arduino_GFX_Library.h>
#include <Wire.h>
#include <SD.h>
#include <SPI.h>
#include <driver/i2s.h>

// ===== DISPLAY PINS =====
#define TFT_SCLK  39
#define TFT_MOSI  38
#define TFT_MISO  40
#define TFT_DC    42
#define TFT_CS    45
#define TFT_RST   -1
#define TFT_BL    1

// ===== BUTTON PINS (mit INPUT_PULLUP) =====
#define BTN_UP      2
#define BTN_DOWN    3
#define BTN_LEFT    4
#define BTN_RIGHT   5
#define BTN_A       6
#define BTN_B       7
#define BTN_START   8
#define BTN_SELECT  9

// ===== POTENTIOMETER (ADC) =====
#define POT_VOLUME  10  // ADC für Lautstärke
#define POT_BRIGHT  11  // ADC für Helligkeit

// ===== I2S AUDIO (MAX98357A) =====
#define I2S_BCLK    12
#define I2S_LRC     13
#define I2S_DOUT    14
#define I2S_NUM     I2S_NUM_0

// ===== NFC (PN532 auf Touch-I2C) =====
#define NFC_SDA     48
#define NFC_SCL     47
#define PN532_I2C_ADDRESS 0x24

// ===== SD CARD =====
#define SD_CS       15

// ===== DISPLAY =====
#define SCREEN_WIDTH  240
#define SCREEN_HEIGHT 320

Arduino_DataBus *bus = new Arduino_ESP32SPI(TFT_DC, TFT_CS, TFT_SCLK, TFT_MOSI, TFT_MISO);
Arduino_GFX *gfx = new Arduino_ST7789(bus, TFT_RST, 0, true, SCREEN_WIDTH, SCREEN_HEIGHT);

// ===== GLOBALE VARIABLEN =====
int volumePercent = 50;
int brightnessPercent = 80;
String nfcUID = "Waiting...";
bool sdCardOK = false;

// ===== CHIPTUNE FREQUENCY TABLE =====
const int NOTE_C4 = 262;
const int NOTE_D4 = 294;
const int NOTE_E4 = 330;
const int NOTE_F4 = 349;
const int NOTE_G4 = 392;
const int NOTE_A4 = 440;
const int NOTE_B4 = 494;
const int NOTE_C5 = 523;

int melody[] = {NOTE_E4, NOTE_E4, 0, NOTE_E4, 0, NOTE_C4, NOTE_E4, 0, 
                NOTE_G4, 0, 0, 0, NOTE_G4, 0, 0, 0};
int noteDurations[] = {200, 200, 200, 200, 200, 200, 200, 200,
                       200, 200, 200, 200, 200, 200, 200, 200};
int currentNote = 0;
unsigned long lastNoteTime = 0;

// ===== SETUP I2S AUDIO =====
void setupAudio() {
  i2s_config_t i2s_config = {
    .mode = (i2s_mode_t)(I2S_MODE_MASTER | I2S_MODE_TX),
    .sample_rate = 16000,
    .bits_per_sample = I2S_BITS_PER_SAMPLE_16BIT,
    .channel_format = I2S_CHANNEL_FMT_ONLY_RIGHT,
    .communication_format = I2S_COMM_FORMAT_I2S_MSB,
    .intr_alloc_flags = ESP_INTR_FLAG_LEVEL1,
    .dma_buf_count = 8,
    .dma_buf_len = 64,
    .use_apll = false,
    .tx_desc_auto_clear = true,
    .fixed_mclk = 0
  };
  
  i2s_pin_config_t pin_config = {
    .bck_io_num = I2S_BCLK,
    .ws_io_num = I2S_LRC,
    .data_out_num = I2S_DOUT,
    .data_in_num = I2S_PIN_NO_CHANGE
  };
  
  i2s_driver_install(I2S_NUM, &i2s_config, 0, NULL);
  i2s_set_pin(I2S_NUM, &pin_config);
  Serial.println("✓ Audio initialized");
}

// ===== PLAY TONE =====
void playTone(int frequency, int duration) {
  if (frequency == 0) {
    delay(duration);
    return;
  }
  
  const int sampleRate = 16000;
  const int samples = (sampleRate * duration) / 1000;
  int16_t sample;
  size_t bytes_written;
  
  float amplitude = (volumePercent / 100.0) * 10000;
  
  for (int i = 0; i < samples; i++) {
    sample = (int16_t)(amplitude * sin(2.0 * PI * frequency * i / sampleRate));
    i2s_write(I2S_NUM, &sample, sizeof(sample), &bytes_written, portMAX_DELAY);
  }
}

// ===== SETUP BUTTONS =====
void setupButtons() {
  pinMode(BTN_UP, INPUT_PULLUP);
  pinMode(BTN_DOWN, INPUT_PULLUP);
  pinMode(BTN_LEFT, INPUT_PULLUP);
  pinMode(BTN_RIGHT, INPUT_PULLUP);
  pinMode(BTN_A, INPUT_PULLUP);
  pinMode(BTN_B, INPUT_PULLUP);
  pinMode(BTN_START, INPUT_PULLUP);
  pinMode(BTN_SELECT, INPUT_PULLUP);
  Serial.println("✓ Buttons initialized");
}

// ===== SETUP POTIS =====
void setupPotis() {
  pinMode(POT_VOLUME, INPUT);
  pinMode(POT_BRIGHT, INPUT);
  analogSetAttenuation(ADC_11db);
  Serial.println("✓ Potentiometers initialized");
}

// ===== SETUP NFC =====
void setupNFC() {
  Wire.begin(NFC_SDA, NFC_SCL);
  Serial.println("✓ NFC I2C initialized");
}

// ===== READ NFC (vereinfacht) =====
void readNFC() {
  Wire.beginTransmission(PN532_I2C_ADDRESS);
  if (Wire.endTransmission() == 0) {
    nfcUID = "PN532 Found!";
  } else {
    nfcUID = "No card...";
  }
}

// ===== SETUP SD CARD =====
void setupSD() {
  pinMode(SD_CS, OUTPUT);
  digitalWrite(SD_CS, HIGH);
  
  if (SD.begin(SD_CS, SPI, 4000000)) {
    Serial.println("✓ SD Card initialized");
    sdCardOK = true;
    testSDCard();
  } else {
    Serial.println("❌ SD Card init failed");
    sdCardOK = false;
  }
}

// ===== TEST SD CARD =====
void testSDCard() {
  File file = SD.open("/test.txt", FILE_WRITE);
  if (file) {
    file.println("LEGO GameBoy Hardware Test");
    file.close();
    Serial.println("✓ SD Write OK");
    
    file = SD.open("/test.txt");
    if (file) {
      String content = file.readString();
      file.close();
      if (content.indexOf("LEGO") >= 0) {
        Serial.println("✓ SD Read OK");
        sdCardOK = true;
      }
    }
  } else {
    sdCardOK = false;
  }
}

// ===== DRAW BUTTON =====
void drawButton(int x, int y, int w, int h, String label, bool pressed) {
  uint16_t color = pressed ? RED : 0x4208;
  gfx->fillRoundRect(x, y, w, h, 4, color);
  gfx->drawRoundRect(x, y, w, h, 4, WHITE);
  
  gfx->setTextColor(WHITE);
  gfx->setTextSize(1);
  int16_t x1, y1;
  uint16_t tw, th;
  gfx->getTextBounds(label.c_str(), 0, 0, &x1, &y1, &tw, &th);
  gfx->setCursor(x + (w - tw) / 2, y + (h - th) / 2);
  gfx->print(label);
}

// ===== DRAW BAR =====
void drawBar(int x, int y, int w, int h, int percent, String label) {
  gfx->setTextColor(WHITE);
  gfx->setTextSize(1);
  gfx->setCursor(x, y - 12);
  gfx->print(label + ": " + String(percent) + "%");
  
  gfx->drawRect(x, y, w, h, WHITE);
  int fillWidth = (w - 4) * percent / 100;
  gfx->fillRect(x + 2, y + 2, fillWidth, h - 4, GREEN);
}

// ===== DRAW UI =====
void drawUI() {
  gfx->fillScreen(BLACK);
  
  // Title
  gfx->setTextColor(CYAN);
  gfx->setTextSize(2);
  gfx->setCursor(10, 5);
  gfx->print("HW Test Tool");
  
  // D-Pad
  bool up = !digitalRead(BTN_UP);
  bool down = !digitalRead(BTN_DOWN);
  bool left = !digitalRead(BTN_LEFT);
  bool right = !digitalRead(BTN_RIGHT);
  
  drawButton(40, 50, 25, 25, "^", up);      // UP
  drawButton(40, 100, 25, 25, "v", down);   // DOWN
  drawButton(15, 75, 25, 25, "<", left);    // LEFT
  drawButton(65, 75, 25, 25, ">", right);   // RIGHT
  
  // A, B Buttons
  bool a = !digitalRead(BTN_A);
  bool b = !digitalRead(BTN_B);
  drawButton(180, 75, 30, 30, "A", a);
  drawButton(140, 75, 30, 30, "B", b);
  
  // Start, Select
  bool start = !digitalRead(BTN_START);
  bool select = !digitalRead(BTN_SELECT);
  drawButton(130, 115, 45, 20, "START", start);
  drawButton(180, 115, 45, 20, "SEL", select);
  
  // Volume Bar
  drawBar(10, 150, 220, 20, volumePercent, "Volume");
  
  // Brightness Bar
  drawBar(10, 185, 220, 20, brightnessPercent, "Bright");
  
  // NFC Status
  gfx->setTextColor(YELLOW);
  gfx->setTextSize(1);
  gfx->setCursor(10, 220);
  gfx->print("NFC: " + nfcUID);
  
  // SD Card Status
  gfx->setCursor(10, 235);
  gfx->setTextColor(sdCardOK ? GREEN : RED);
  gfx->print("SD Card: ");
  gfx->print(sdCardOK ? "OK" : "FAIL");
  
  // Music Status
  gfx->setTextColor(MAGENTA);
  gfx->setCursor(10, 250);
  gfx->print("Music: Playing...");
  
  // Instructions
  gfx->setTextColor(WHITE);
  gfx->setTextSize(1);
  gfx->setCursor(10, 280);
  gfx->print("Test all buttons!");
  gfx->setCursor(10, 295);
  gfx->print("Turn potentiometers!");
}

// ===== SETUP =====
void setup() {
  Serial.begin(115200);
  delay(1000);
  
  Serial.println("\n========================================");
  Serial.println("  LEGO GameBoy Hardware Test Tool");
  Serial.println("========================================\n");
  
  // Display
  pinMode(TFT_BL, OUTPUT);
  digitalWrite(TFT_BL, HIGH);
  gfx->begin();
  gfx->invertDisplay(true);
  gfx->fillScreen(BLACK);
  Serial.println("✓ Display initialized");
  
  // Hardware Init
  setupButtons();
  setupPotis();
  setupAudio();
  setupNFC();
  setupSD();
  
  Serial.println("\n========================================");
  Serial.println("  All systems ready!");
  Serial.println("========================================\n");
  
  drawUI();
}

// ===== MAIN LOOP =====
void loop() {
  // Read Potentiometers
  int volRaw = analogRead(POT_VOLUME);
  int brightRaw = analogRead(POT_BRIGHT);
  
  volumePercent = map(volRaw, 0, 4095, 0, 100);
  brightnessPercent = map(brightRaw, 0, 4095, 0, 100);
  
  // Set Brightness
  int blValue = map(brightnessPercent, 0, 100, 0, 255);
  analogWrite(TFT_BL, blValue);
  
  // Read NFC every 2 seconds
  static unsigned long lastNFCRead = 0;
  if (millis() - lastNFCRead > 2000) {
    readNFC();
    lastNFCRead = millis();
  }
  
  // Play Chiptune
  if (millis() - lastNoteTime > noteDurations[currentNote]) {
    if (melody[currentNote] > 0) {
      playTone(melody[currentNote], noteDurations[currentNote]);
    }
    currentNote = (currentNote + 1) % 16;
    lastNoteTime = millis();
  }
  
  // Update Display every 100ms
  static unsigned long lastUpdate = 0;
  if (millis() - lastUpdate > 100) {
    drawUI();
    lastUpdate = millis();
  }
}
```

Danach auf den Haken zum Überpüfen klicken.

[![image.png](https://wiki.hacker-net.de/uploads/images/gallery/2025-10/scaled-1680-/7MnGhUKIT82XJMdy-image.png)](https://wiki.hacker-net.de/uploads/images/gallery/2025-10/7MnGhUKIT82XJMdy-image.png)

Nun kompiliert er

[![image.png](https://wiki.hacker-net.de/uploads/images/gallery/2025-10/scaled-1680-/XyXvtvQ18JSbHWiI-image.png)](https://wiki.hacker-net.de/uploads/images/gallery/2025-10/XyXvtvQ18JSbHWiI-image.png)

Wenn fertig steht in der Ausgabe wie viel Speicher benutzt wird.

```
Der Sketch verwendet 483199 Bytes (36%) des Programmspeicherplatzes. Das Maximum sind 1310720 Bytes.
Globale Variablen verwenden 22984 Bytes (7%) des dynamischen Speichers, 304696 Bytes für lokale Variablen verbleiben. Das Maximum sind 327680 Bytes.

```

Nun können wir das auf den ESP32 hochladen mit dem Pfeil nach recht Button

[![image.png](https://wiki.hacker-net.de/uploads/images/gallery/2025-10/scaled-1680-/8dSqyGJFPFX96eWm-image.png)](https://wiki.hacker-net.de/uploads/images/gallery/2025-10/8dSqyGJFPFX96eWm-image.png)