NextCloud
Nextcloud ist eine freie Software für das Speichern von Daten auf einem Server. Auf die Daten kann der Anwender sowohl über eine Weboberfläche als auch mit Client-Applikationen zugreifen. Server und Clients können sich dabei synchronisieren
- Update
- Update Fehler Beheben / Einstellungen Allegmein Fehlerbehebung
- Alle Apps entfernen die nicht Standard sind
- Installation
- Installation Docker mit MariaDB SSL Nextcloud AIO
- Weitere DNS Namen mit Lets encrypt hinzufügen
- Outlook Plugin - Nextcloud Anhänge
- API Calls
Update
Update Fehler Beheben / Einstellungen Allegmein Fehlerbehebung
Beschreibung:
Ab und zu hängt die Nextcloud leider beim Update.
Hier ein paar Standard Fehler die auftreten können
Stuck on update process. Step X is currently in.
(x is the Step Number)
Dazu gehen wir in das Verzeichnis Data unsere instanceid und dann in das Verzeichnis updater-oc5nyh09z8xz.
Dort gib es zwei Dateien
.step-previous-update
.step
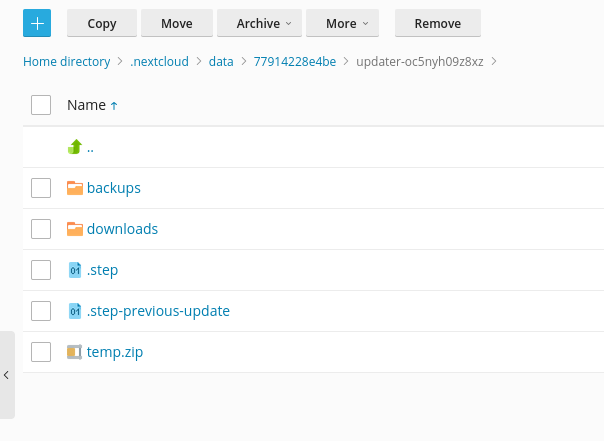
Diese Dateien löschen.
Schon kann der Update Process von vorne beginnen
Wartungsmodus beenden
Nach einem fehlerhaften Update ist die Nextcloud immer noch im Wartungsmodus.
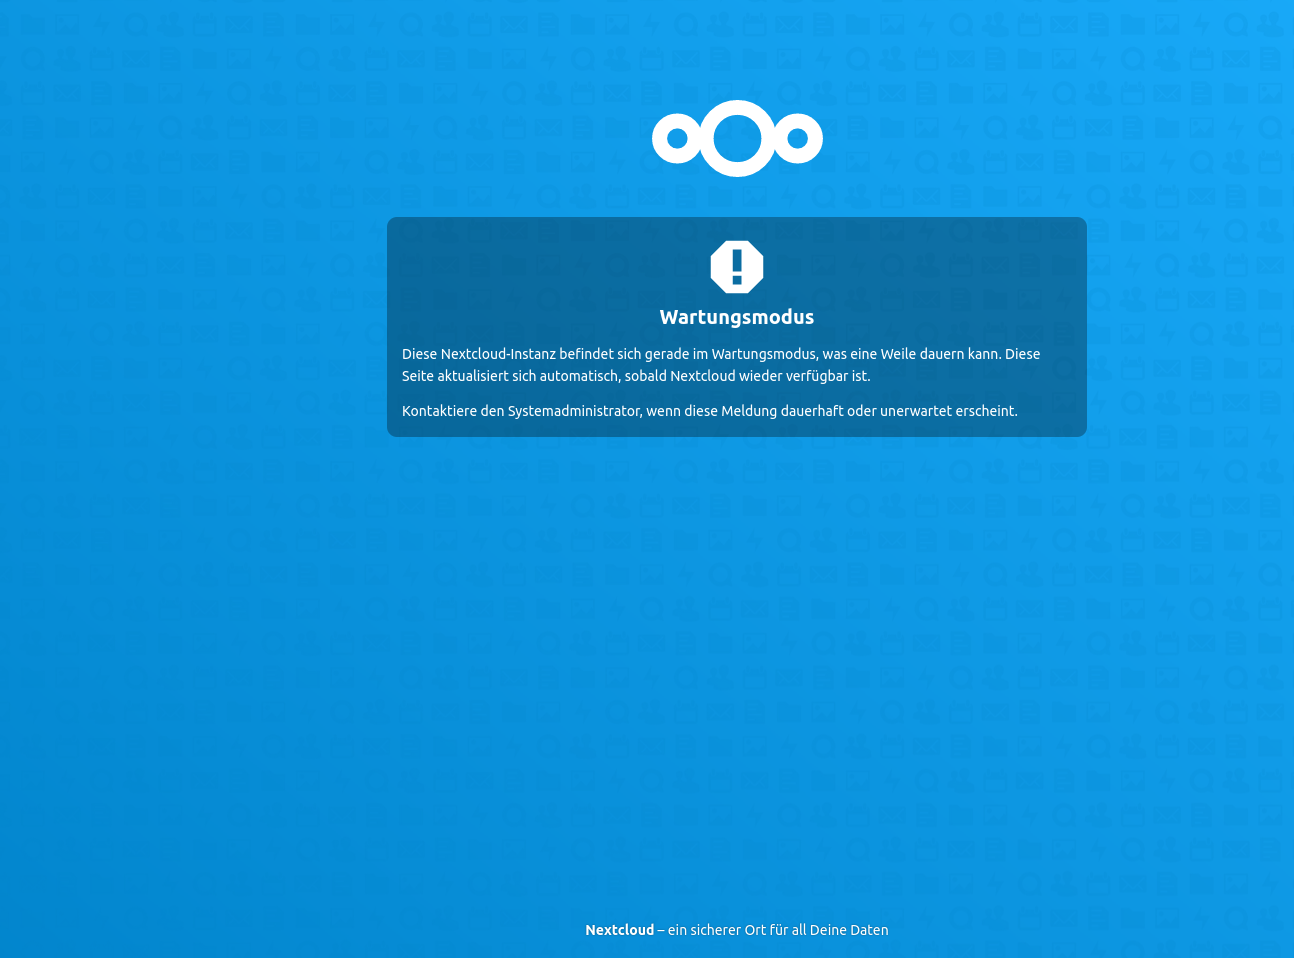
um diesen zu beenden, die config.php im Nectcloud Ordner /configconfig.php öffnen
und dort die Zeile
...
 'maintenance' => true,
 ...


 auf

 ...
  'maintenance' => false,
 ...


 stellen und speichern
MySQL wird als Datenbank verwendet, unterstützt jedoch keine 4-Byte-Zeichen. Um beispielsweise 4-Byte-Zeichen (wie Emojis) ohne Probleme mit Dateinamen oder Kommentaren verarbeiten zu können, wird empfohlen, die 4-Byte-Unterstützung in MySQL zu aktivieren.
In Plesk mit MariaDB
Dazu PHP MyAdmin öffnen und schauen ob die innodv variable auf on ist
Unter SQL Befehl können Befehler eingeben werden.
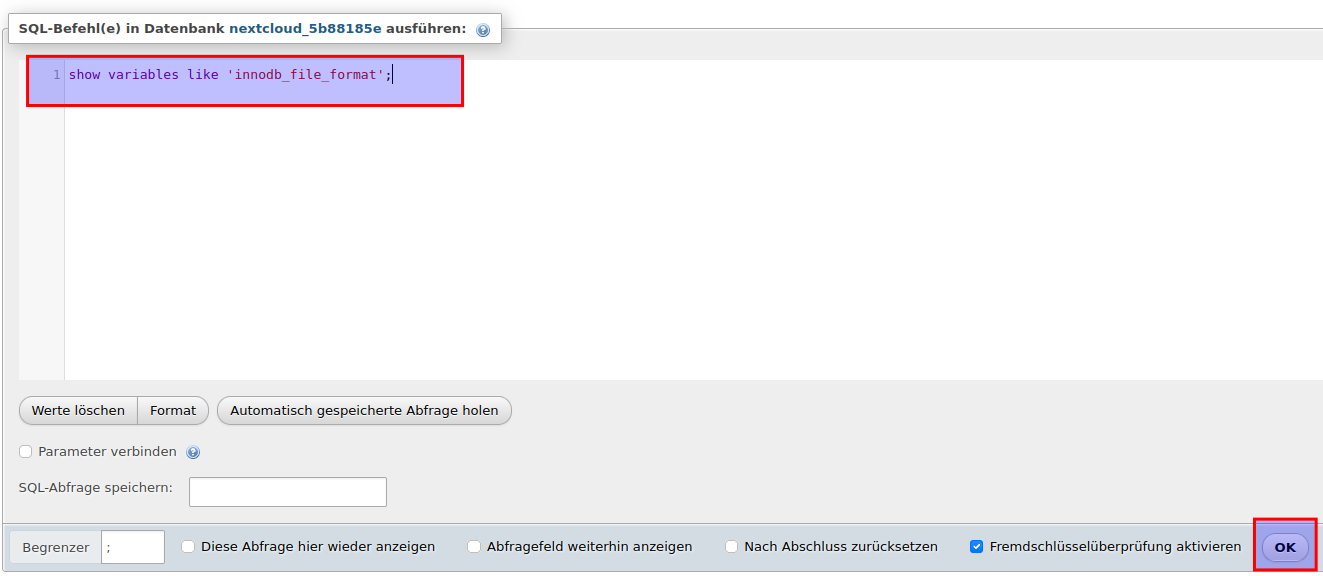
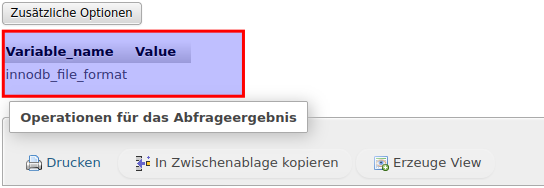
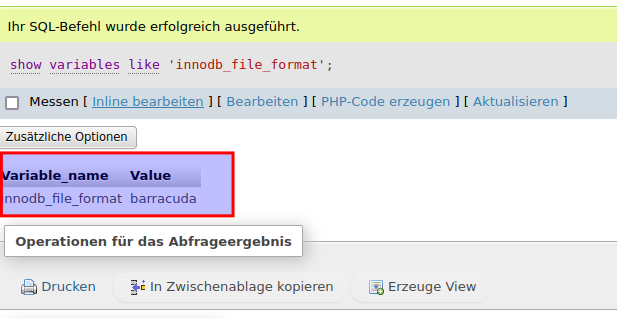
So sollte es aussehen
mysql> show variables like 'innodb_file_format';
+--------------------+-----------+
| Variable_name      | Value     |
+--------------------+-----------+
| innodb_file_format | Barracuda |
+--------------------+-----------+
1 row in set (0.00 sec)
Sieht das ganze aber so aus, müssen wir das anpassen, aber das machen wir im späteren step, weil wir vorher noch ne andere Variable prüfen
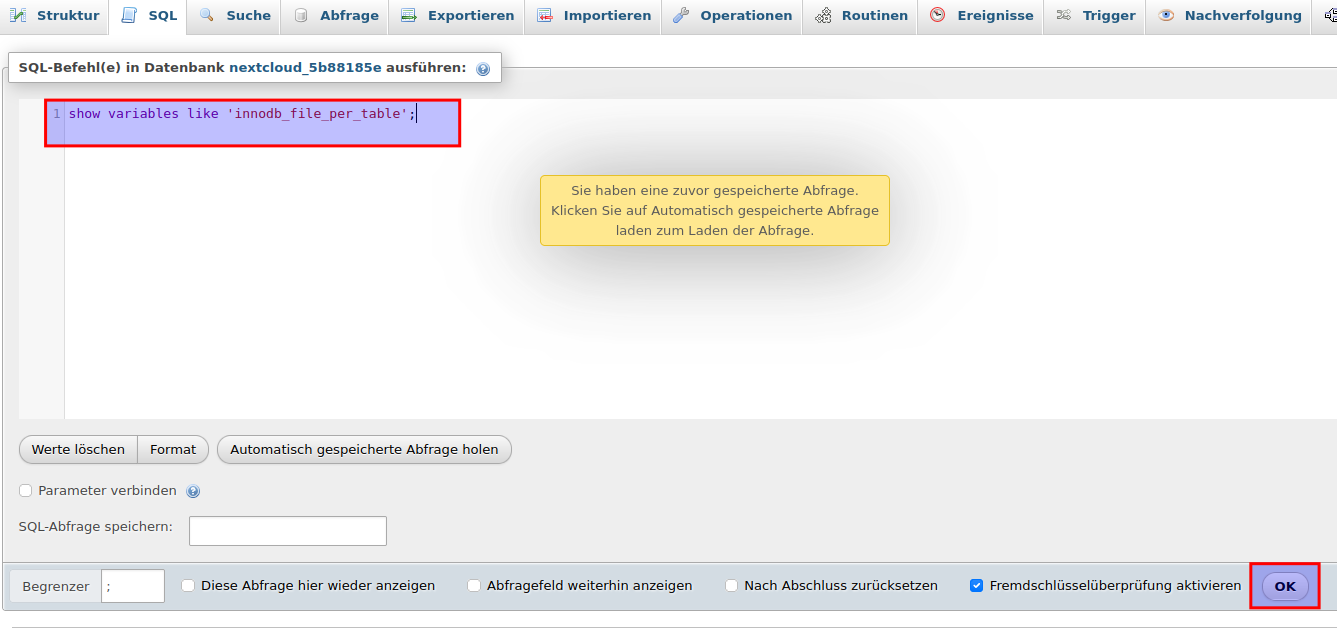
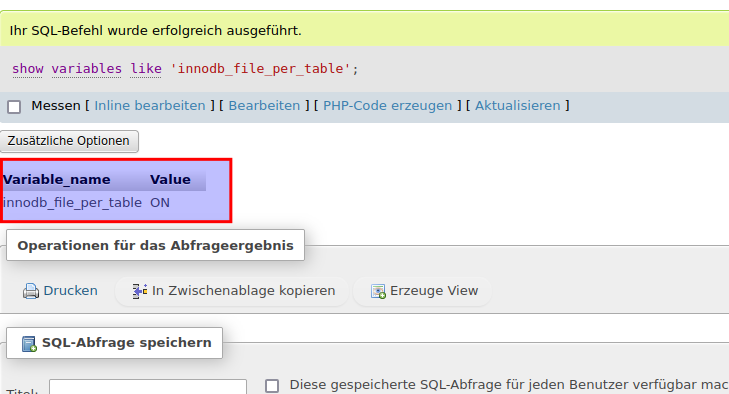
So sollte es aussehen
mysql> show variables like 'innodb_file_per_table';
+-----------------------+-------+
| Variable_name         | Value |
+-----------------------+-------+
| innodb_file_per_table | ON    |
+-----------------------+-------+
1 row in set (0.00 sec)
Passt,
ansonten in der mysql conf diese Zeile hinzufügen.
nano /etc/mysql/my.cnf und dieses in die rubrik mysqld hinzufügen
...
[mysqld]
...
innodb_file_per_table=1
...
Um den ersten Fehler zu beheben fügen wir noch zwei weitere optionen zu mysqld hinzu
innodb_large_prefix=true
innodb_file_format=barracuda
innodb_file_per_table=1
Danach den mariadb server neustarten
service mariadb restartNun die erste abfrage nochmals durchführen. Jetzt passt es
Migrieren der Tabellen zu barracude, dazu als mysql root in der shell einloggen (ssh)
mysql -uadmin -p`cat /etc/psa/.psa.shadow`Nun sind wir in mysql eingeloggt
elcome to the MariaDB monitor.  Commands end with ; or \g.
Your MariaDB connection id is 2175
Server version: 10.3.39-MariaDB-0+deb10u1 Debian 10

Copyright (c) 2000, 2018, Oracle, MariaDB Corporation Ab and others.

Type 'help;' or '\h' for help. Type '\c' to clear the current input statement.

MariaDB [(none)]>
Nun das Schema anpassen
USE INFORMATION_SCHEMA;
SELECT CONCAT("ALTER TABLE `", TABLE_SCHEMA,"`.`", TABLE_NAME, "` ROW_FORMAT=DYNAMIC;") AS MySQLCMD FROM TABLES WHERE TABLE_SCHEMA = "nextcloud";
Nun die Nextcloud DB anpassen, achte auf den DB namen
ALTER DATABASE nextcloud_5b88185e CHARACTER SET utf8mb4 COLLATE utf8mb4_general_ci;Ausgabe:
MariaDB [INFORMATION_SCHEMA]> ALTER DATABASE nextcloud_5b88185e CHARACTER SET utf8mb4 COLLATE utf8mb4_general_ci;
Query OK, 1 row affected (0.001 sec)
Nun in den mysql cleint verlassen.
Danach den mariadb server neustarten.
Nextcloud in Maintenance mode setzen, hier ist das sudo wichtig damit es mit www rechten ausgeführt wird.
Der Benutzername ist der Plesk Benutzer des jeweiligen Domainspaces.
Kann im Fileexplorer nachgeschaut werden.
Die PHP Versionkann in Plesk unter der Subdomain nachgeschaut werden.
bevor wir Maintenace setzten aktivieren wir noch in der config
sudo -u <username> /opt/plesk/php/<php-version>/bin/php /var/www/vhosts/<domain>/<subdomain>/occ config:system:set mysql.utf8mb4 --type boolean --value="true"sudo -u <username> /opt/plesk/php/<php-version>/bin/php /var/www/vhosts/<domain>/<subdomain>/occ maintenance:mode --onUnd die tabellen anpassen
sudo -u <username> /opt/plesk/php/<php-version>/bin/php /var/www/vhosts/<domain>/<subdomain>/occ maintenance:repair
Danach den Maintenence Mode wieder beenden
sudo -u <username> /opt/plesk/php/<php-version>/bin/php /var/www/vhosts/<domain>/<subdomain>/occ maintenance:mode --offNun ist der Fehler weg und Es können auch Emojies in Dateinamen Kalender Aufgaben verwednet werden.
Der HTTP-Header "Strict-Transport-Security" ist nicht auf mindestens 15552000 Sekunden eingestellt. Für mehr Sicherheit wird das Aktivieren von HSTS empfohlen, wie es in den Sicherheitshinweisen erläutert ist.
Dazu in Plesk anmelden, auf die Domain oder Subdomain klicken.
Dann auf Files dort die .htaccess anpassen und diesen Wert hinzufügen
Header always set Strict-Transport-Security "max-age=15552000; includeSubDomains"Dieses muss unter umständen bei jedem Update neu gesetzt werden.
Es wurde kein PHP-Memory-Cache konfiguriert. Zur Erhöhung der Leistungsfähigkeit kann ein Memory-Cache konfiguriert werden.
- Anleitung folgt für Plesk
In der Datenbank fehlen einige Indizes. Auf Grund der Tatsache, dass das Hinzufügen von Indizes in großen Tabellen einige Zeit in Anspruch nehmen kann, wurden diese nicht automatisch erzeugt. Durch das Ausführen von "occ db:add-missing-indices" können die fehlenden Indizes manuell hinzugefügt werden, während die Instanz weiter läuft. Nachdem die Indizes hinzugefügt wurden, sind Anfragen auf die Tabellen normalerweise schneller.
Nextcloud in Maintenance mode setzen, hier ist das sudo wichtig damit es mit Webseiten Benutzerrechten ausgeführt wird.
Der Benutzername ist der Plesk Benutzer des jeweiligen Domainspaces.
Kann im Fileexplorer nachgeschaut werden.
Die PHP Versionkann in Plesk unter der Subdomain nachgeschaut werden.
sudo -u <username> /opt/plesk/php/<php-version>/bin/php /var/www/vhosts/<domain>/<subdomain>/occ db:add-missing-indicesIn der Datenbank fehlen einige Primärschlüssel. Aufgrund der Tatsache, dass das Hinzufügen von Primärschlüsseln bei großen Tabellen einige Zeit dauern konnte, wurden sie nicht automatisch hinzugefügt. Durch Ausführen von "occ db:add-missing-primary-keys" können diese fehlenden Primärschlüssel manuell hinzugefügt werden, während die Instanz weiter läuft.
Nextcloud in Maintenance mode setzen, hier ist das sudo wichtig damit es mit Webseiten Benutzerrechten ausgeführt wird.
Der Benutzername ist der Plesk Benutzer des jeweiligen Domainspaces.
Kann im Fileexplorer nachgeschaut werden.
Die PHP Versionkann in Plesk unter der Subdomain nachgeschaut werden.
sudo -u <username> /opt/plesk/php/<php-version>/bin/php /var/www/vhosts/<domain>/<subdomain>/occ db:add-missing-primary-keysIn der Datenbank fehlen einige optionale Spalten. Da das Hinzufügen von Spalten bei großen Tabellen einige Zeit dauern kann, wurden sie nicht automatisch hinzugefügt, wenn sie optional sein können. Durch Ausführen von "occ db:add-missing-columns" können diese fehlenden Spalten manuell hinzugefügt werden, während die Instanz weiter läuft. Sobald die Spalten hinzugefügt sind, könnten einige Funktionen die Reaktionsfähigkeit oder die Benutzerfreundlichkeit verbessern.
Hier ist das sudo wichtig damit es mit Webseiten Benutzerrechten ausgeführt wird.
Der Benutzername ist der Plesk Benutzer des jeweiligen Domainspaces.
Kann im Fileexplorer nachgeschaut werden.
Die PHP Versionkann in Plesk unter der Subdomain nachgeschaut werden.
sudo -u <username> /opt/plesk/php/<php-version>/bin/php /var/www/vhosts/<domain>/<subdomain>/occ db:add-missing-columnsBei einigen Spalten in der Datenbank fehlt eine Konvertierung in big int. Aufgrund der Tatsache, dass das Ändern von Spaltentypen bei großen Tabellen einige Zeit dauern kann, wurden sie nicht automatisch geändert. Durch Ausführen von "occ db:convert-filecache-bigint" können diese ausstehenden Änderungen manuell übernommen werden. Diese Operation muss ausgeführt werden, während die Instanz offline ist
Nextcloud in Maintenance mode setzen, hier ist das sudo wichtig damit es mit Webseiten Benutzerrechten ausgeführt wird.
Der Benutzername ist der Plesk Benutzer des jeweiligen Domainspaces.
Kann im Fileexplorer nachgeschaut werden.
Die PHP Versionkann in Plesk unter der Subdomain nachgeschaut werden.
Maintenance Mode on
sudo -u <username> /opt/plesk/php/<php-version>/bin/php /var/www/vhosts/<domain>/<subdomain>/occ maintenance:mode --onNun die Korrektur ausführen
sudo -u <username> /opt/plesk/php/<php-version>/bin/php /var/www/vhosts/<domain>/<subdomain>/occ db:convert-filecache-bigintMaintenance Mode deaktivieren
sudo -u <username> /opt/plesk/php/<php-version>/bin/php /var/www/vhosts/<domain>/<subdomain>/occ maintenance:mode --offFür Deine Installation ist keine Standard-Telefonregion festgelegt. Dies ist erforderlich, um Telefonnummern in den Profileinstellungen ohne Ländercode überprüfen zu können. Um Nummern ohne Ländercode zuzulassen, füge bitte "default_phone_region" mit dem entsprechenden ISO 3166-1-Code ↗ der gewünschten Region hinzu.
sudo -u <username> /opt/plesk/php/<php-version>/bin/php /var/www/vhosts/<domain>/<subdomain>/occ config:system:set default_phone_region --value="DE"Dem Modul php-imagick fehlt die SVG-Unterstützung. Für eine bessere Kompatibilität wird empfohlen, es zu installieren
Per ssh einloggen un d folgendes Paket installieren
sudo apt-get install libmagickcore-devFertig.
Alle Apps entfernen die nicht Standard sind
Beschreibung:
Hier ein Script mit dem alle Apps entfernt werden können. Die nicht Standard sind.
hier ist das sudo wichtig damit es mit Webseiten Benutzerrechten ausgeführt wird.
Der Benutzername ist der Plesk Benutzer des jeweiligen Domainspaces.
Kann im Fileexplorer nachgeschaut werden.
Die PHP Versionkann in Plesk unter der Subdomain nachgeschaut werden.
Damit das Skript funktioniert wird noch die abbhängigkeit jq installiert
apt install jqDas Skript
#!/bin/bash

# Liste der standardmäßig installierten Apps
standard_apps=("files" "activity" "cloud_federation_api" "dav" "federatedfilesharing" "federation" "files_external" "files_sharing" "files_trashbin" "files_versions" "lookup_server_connector" "oauth2" "provisioning_api" "serverinfo" "sharebymail" "text" "twofactor_backupcodes" "updatenotification" "viewer" "workflowengine")

# Holen Sie sich die Liste der installierten Apps
installed_apps=$(sudo -u <username> /opt/plesk/php/<php-version>/bin/php /var/www/vhosts/<domain>/<subdomain>/occ app:list --output=json | jq -r 'keys[]')

# Durchlaufen Sie die installierten Apps
for app in $installed_apps; do
  # Prüfen Sie, ob die App in der Liste der standardmäßig installierten Apps enthalten ist
  if [[ ! " ${standard_apps[@]} " =~ " ${app} " ]]; then
    # Wenn die App nicht in der Liste ist, deaktivieren Sie sie
    sudo -u <username> /opt/plesk/php/<php-version>/bin/php /var/www/vhosts/<domain>/<subdomain>/occ app:disable $app
    # Und entfernen Sie sie (optional)
    rm -rf /var/www/vhosts/<domain>/<subdomain>/apps/$app
  fi
done
Installation
Installation Docker mit MariaDB SSL Nextcloud AIO
Beschreibung:
Nextcloud installation via docker-compose script.
Wir nutzen für das Letsencrypt cert das image linuxserver/swag.
Dies ist ein image was letsencrypt und den nginx vereint
Installation
Vorbereitung
DNS-A/AAAA Record anlegen
Sobald die URL mit 8443 nach dem starten des Containers aufgerufen wird, wird wenn die DNS Records richtig gesetzt sind.
gleich ein gültiges Zertifikat von Lets Encrypt abgerufen. Ist das nicht geil? ;-)
Docker und Verzeichnisse anlegen
apt install docker.io docker-compose apparmor
mkdir -p /root/nextcloud/data
Die composer Datei
Hier nur folgendenWert abändern
environment: # Is needed when using any of the options below
  ...
  # - NEXTCLOUD_DATADIR=/mnt/ncdata
zu
 environment: # Is needed when using any of the options below
 ...
   - NEXTCLOUD_DATADIR=/root/nextcloud/data
Hier schon geändert nun einfach einfügen in
nano /root/nextcloud/docker-compose.ymlInhalt:
services:
  nextcloud-aio-mastercontainer:
    image: nextcloud/all-in-one:latest
    init: true
    restart: always
    container_name: nextcloud-aio-mastercontainer # This line is not allowed to be changed as otherwise AIO will not work correctly
    volumes:
      - nextcloud_aio_mastercontainer:/mnt/docker-aio-config # This line is not allowed to be changed as otherwise the built-in backup solution will not work
      - /var/run/docker.sock:/var/run/docker.sock:ro # May be changed on macOS, Windows or docker rootless. See the applicable documentation. If adjusting, don't forget to also set 'WATCHTOWER_DOCKER_SOCKET_PATH'!
    ports:
      - 80:80 # Can be removed when running behind a web server or reverse proxy (like Apache, Nginx, Cloudflare Tunnel and else). See https://github.com/nextcloud/all-in-one/blob/main/reverse-proxy.md
      - 8080:8080
      - 8443:8443 # Can be removed when running behind a web server or reverse proxy (like Apache, Nginx, Cloudflare Tunnel and else). See https://github.com/nextcloud/all-in-one/blob/main/reverse-proxy.md
    environment: # Is needed when using any of the options below
      # - AIO_DISABLE_BACKUP_SECTION=false # Setting this to true allows to hide the backup section in the AIO interface. See https://github.com/nextcloud/all-in-one#how-to-disable-the-backup-section
      # - APACHE_PORT=11000 # Is needed when running behind a web server or reverse proxy (like Apache, Nginx, Cloudflare Tunnel and else). See https://github.com/nextcloud/all-in-one/blob/main/reverse-proxy.md
      # - APACHE_IP_BINDING=127.0.0.1 # Should be set when running behind a web server or reverse proxy (like Apache, Nginx, Cloudflare Tunnel and else) that is running on the same host. See https://github.com/nextcloud/all-in-one/blob/main/reverse-proxy.md
      # - BORG_RETENTION_POLICY=--keep-within=7d --keep-weekly=4 --keep-monthly=6 # Allows to adjust borgs retention policy. See https://github.com/nextcloud/all-in-one#how-to-adjust-borgs-retention-policy
      # - COLLABORA_SECCOMP_DISABLED=false # Setting this to true allows to disable Collabora's Seccomp feature. See https://github.com/nextcloud/all-in-one#how-to-disable-collaboras-seccomp-feature
      # - NEXTCLOUD_DATADIR=/mnt/ncdata # Allows to set the host directory for Nextcloud's datadir. ⚠️⚠️⚠️ Warning: do not set or adjust this value after the initial Nextcloud installation is done! See https://github.com/nextcloud/all-in-one#how-to-change-the-default-location-of-nextclouds-datadir
      - NEXTCLOUD_DATADIR=/root/nextcloud/data
      - NEXTCLOUD_MOUNT=/mnt/ # Allows the Nextcloud container to access the chosen directory on the host. See https://github.com/nextcloud/all-in-one#how-to-allow-the-nextcloud-container-to-access-directories-on-the-host
      # - NEXTCLOUD_UPLOAD_LIMIT=10G # Can be adjusted if you need more. See https://github.com/nextcloud/all-in-one#how-to-adjust-the-upload-limit-for-nextcloud
      # - NEXTCLOUD_MAX_TIME=3600 # Can be adjusted if you need more. See https://github.com/nextcloud/all-in-one#how-to-adjust-the-max-execution-time-for-nextcloud
      # - NEXTCLOUD_MEMORY_LIMIT=512M # Can be adjusted if you need more. See https://github.com/nextcloud/all-in-one#how-to-adjust-the-php-memory-limit-for-nextcloud
      # - NEXTCLOUD_TRUSTED_CACERTS_DIR=/path/to/my/cacerts # CA certificates in this directory will be trusted by the OS of the nexcloud container (Useful e.g. for LDAPS) See See https://github.com/nextcloud/all-in-one#how-to-trust-user-defined-certification-authorities-ca
      # - NEXTCLOUD_STARTUP_APPS=deck twofactor_totp tasks calendar contacts notes # Allows to modify the Nextcloud apps that are installed on starting AIO the first time. See https://github.com/nextcloud/all-in-one#how-to-change-the-nextcloud-apps-that-are-installed-on-the-first-startup
      # - NEXTCLOUD_ADDITIONAL_APKS=imagemagick # This allows to add additional packages to the Nextcloud container permanently. Default is imagemagick but can be overwritten by modifying this value. See https://github.com/nextcloud/all-in-one#how-to-add-os-packages-permanently-to-the-nextcloud-container
      # - NEXTCLOUD_ADDITIONAL_PHP_EXTENSIONS=imagick # This allows to add additional php extensions to the Nextcloud container permanently. Default is imagick but can be overwritten by modifying this value. See https://github.com/nextcloud/all-in-one#how-to-add-php-extensions-permanently-to-the-nextcloud-container
      # - NEXTCLOUD_ENABLE_DRI_DEVICE=true # This allows to enable the /dev/dri device in the Nextcloud container. ⚠️⚠️⚠️ Warning: this only works if the '/dev/dri' device is present on the host! If it should not exist on your host, don't set this to true as otherwise the Nextcloud container will fail to start! See https://github.com/nextcloud/all-in-one#how-to-enable-hardware-transcoding-for-nextcloud
      # - NEXTCLOUD_KEEP_DISABLED_APPS=false # Setting this to true will keep Nextcloud apps that are disabled in the AIO interface and not uninstall them if they should be installed. See https://github.com/nextcloud/all-in-one#how-to-keep-disabled-apps
      # - TALK_PORT=3478 # This allows to adjust the port that the talk container is using. See https://github.com/nextcloud/all-in-one#how-to-adjust-the-talk-port
      # - WATCHTOWER_DOCKER_SOCKET_PATH=/var/run/docker.sock # Needs to be specified if the docker socket on the host is not located in the default '/var/run/docker.sock'. Otherwise mastercontainer updates will fail. For macos it needs to be '/var/run/docker.sock'
    # networks: # Is needed when you want to create the nextcloud-aio network with ipv6-support using this file, see the network config at the bottom of the file
      # - nextcloud-aio # Is needed when you want to create the nextcloud-aio network with ipv6-support using this file, see the network config at the bottom of the file
    # # Uncomment the following line when using SELinux
    # security_opt: ["label:disable"]

  # # Optional: Caddy reverse proxy. See https://github.com/nextcloud/all-in-one/blob/main/reverse-proxy.md
  # # You can find further examples here: https://github.com/nextcloud/all-in-one/discussions/588
  # caddy:
  #   image: caddy:alpine
  #   restart: always
  #   container_name: caddy
  #   volumes:
  #     - ./Caddyfile:/etc/caddy/Caddyfile
  #     - ./certs:/certs
  #     - ./config:/config
  #     - ./data:/data
  #     - ./sites:/srv
  #   network_mode: "host"

volumes: # If you want to store the data on a different drive, see https://github.com/nextcloud/all-in-one#how-to-store-the-filesinstallation-on-a-separate-drive
  nextcloud_aio_mastercontainer:
    name: nextcloud_aio_mastercontainer # This line is not allowed to be changed as otherwise the built-in backup solution will not work

# # Optional: If you need ipv6, follow step 1 and 2 of https://github.com/nextcloud/all-in-one/blob/main/docker-ipv6-support.md first and then uncomment the below config in order to activate ipv6 for the internal nextcloud-aio network.
# # Please make sure to uncomment also the networking lines of the mastercontainer above in order to actually create the network with docker-compose
# networks:
#   nextcloud-aio:
#     name: nextcloud-aio # This line is not allowed to be changed as otherwise the created network will not be used by the other containers of AIO
#     driver: bridge
#     enable_ipv6: true
#     ipam:
#       driver: default
#       config:
#         - subnet: fd12:3456:789a:2::/64 # IPv6 subnet to use
Nun den Container mit
docker-compose up -dstarten
Nun kann man mit
docker-compose logs -f nextcloud-aio-mastercontainerIn die Logs schauen
Wenn da steht:
 normal operations
nextcloud-aio-mastercontainer    | [Thu Apr 04 20:19:11.145314 2024] [core:notice] [pid 107:tid 140479721929480] AH00094: Command line: 'httpd -D FOREGROUND'
nextcloud-aio-mastercontainer    | {"level":"info","ts":1712261951.1497495,"msg":"using provided configuration","config_file":"/Caddyfile","config_adapter":""}
nextcloud-aio-mastercontainer    | [04-Apr-2024 20:19:11] NOTICE: fpm is running, pid 113
nextcloud-aio-mastercontainer    | [04-Apr-2024 20:19:11] NOTICE: ready to handle connections

Ready for connection, können wir uns verbinden
Sicher gehen das die DNS Einträge schon funktionieren, nach dem anlegen ca 30 Minuten warten.
https://meinedomain.example.com:8443
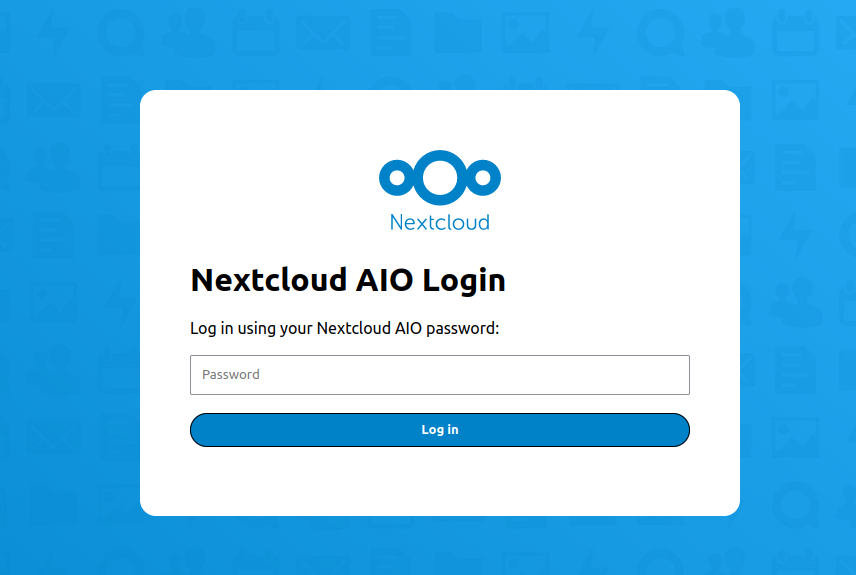
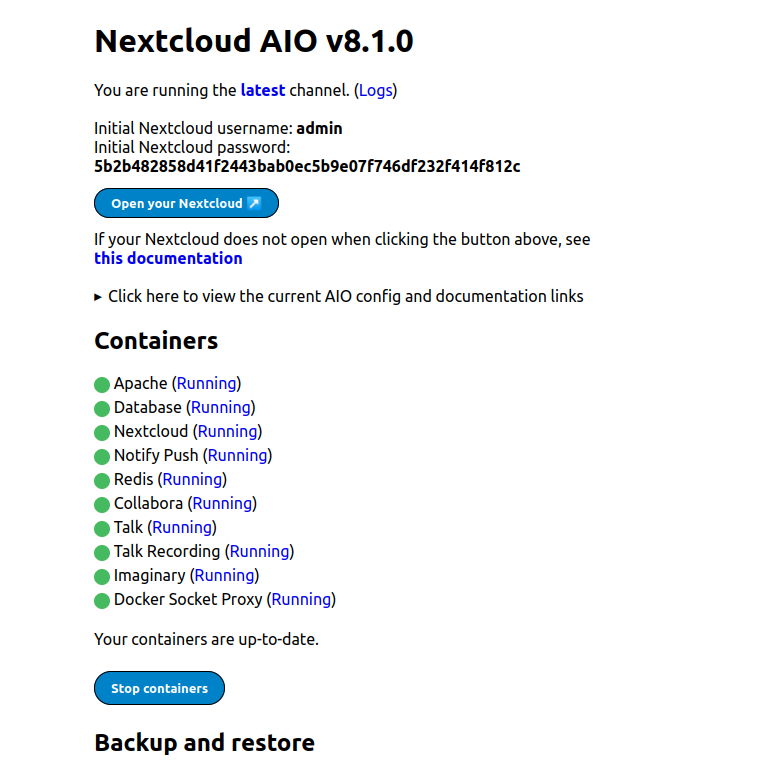
Nun kommt ein Passwort, gut merken bzw rauskopieren.
Wird nur einmal angezeigt und dann auf die Fläche zum starten klicken
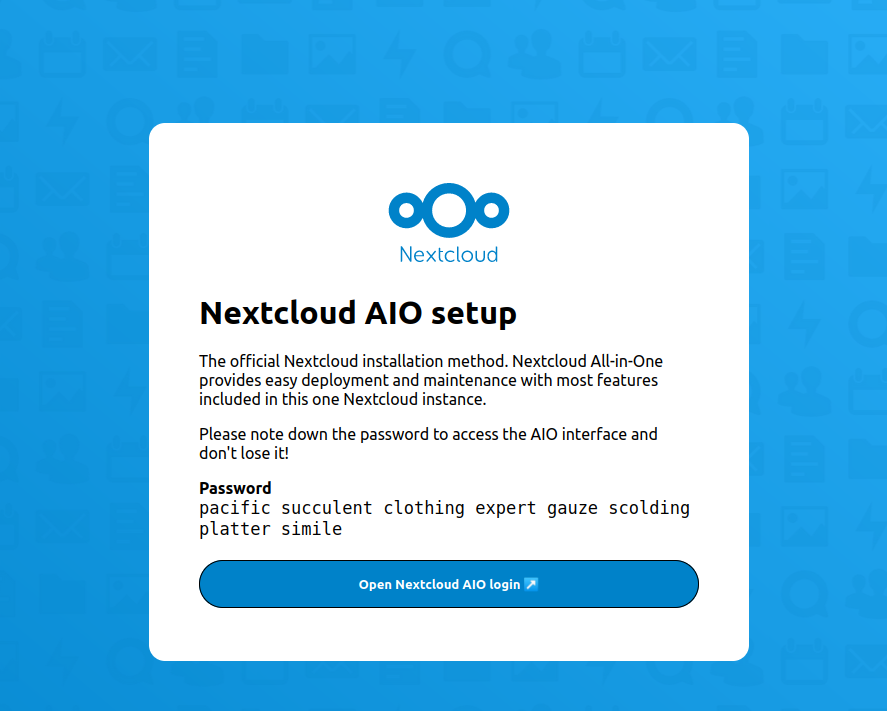
Nun das Kennwort eingeben, was wir gerade kopiert haben
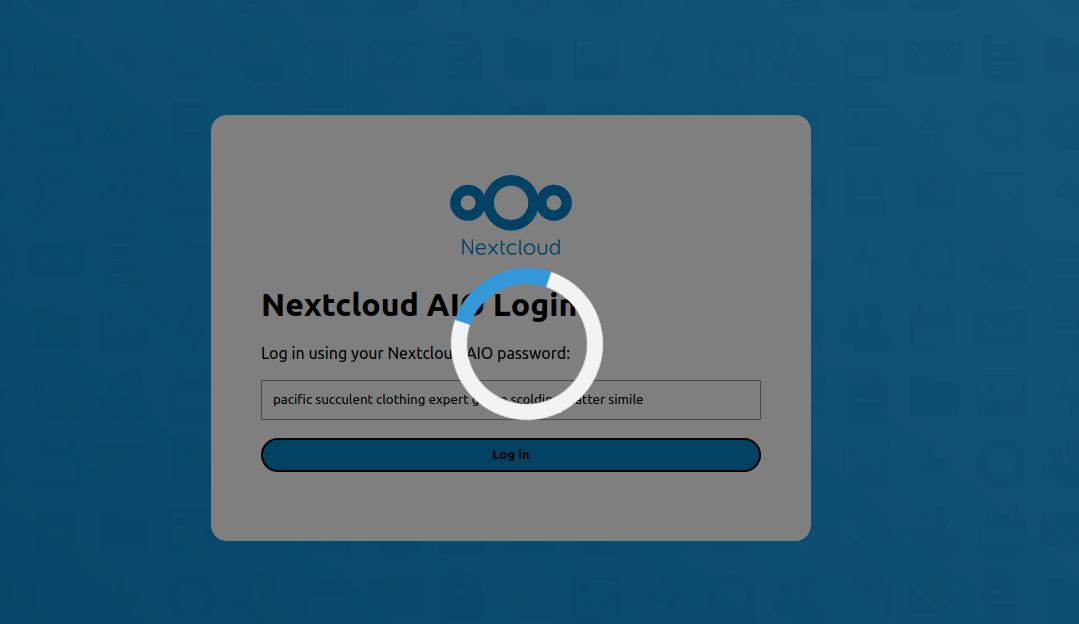
Nun kann es sein das er endlos kringelt.
Dann die Seite nochmal aufrufen und Kennwort nochmal eingeben
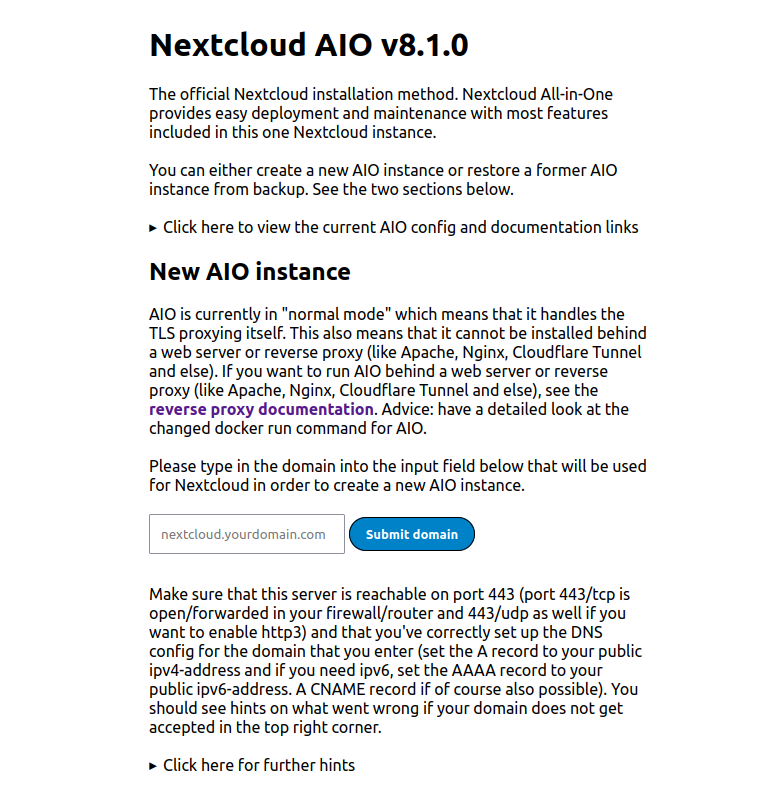
Nun den Domain namen angeben z.b nextcloud.example.com und dann auf submit Domain klicken
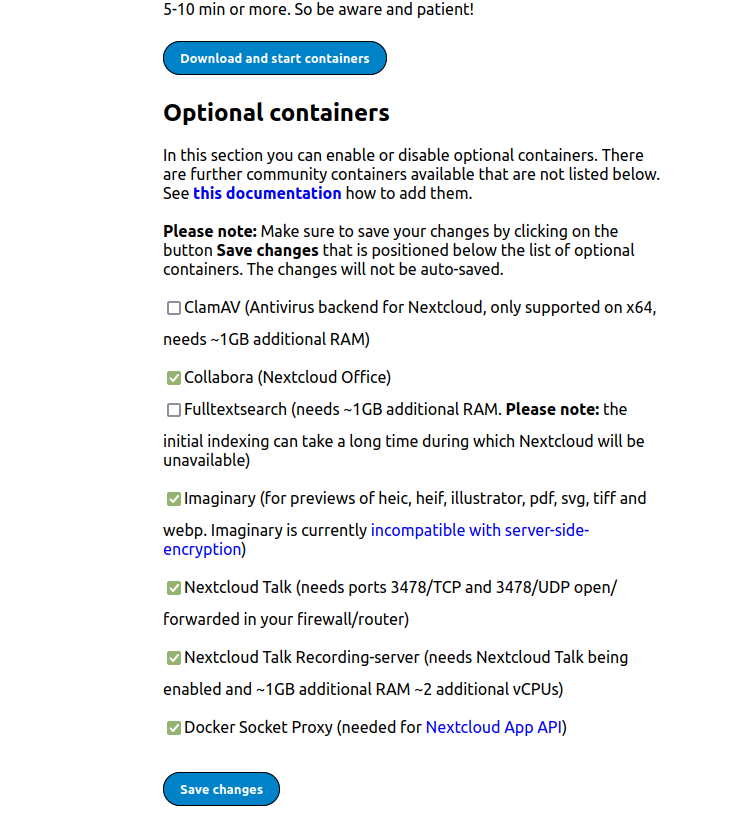
Nun kann ausgewählt werden welche Komponenten man installiert haben möchte.
Wenn man noch welche dazu wählt,auf save changes klicken.
Nun auf Download und start containers klicken
Nach der installation, wird einmal das Admin Kennwort für die Cloud angezeigt.
Danach kann über open your Nextcloud die Nextcloud betrieben werden.
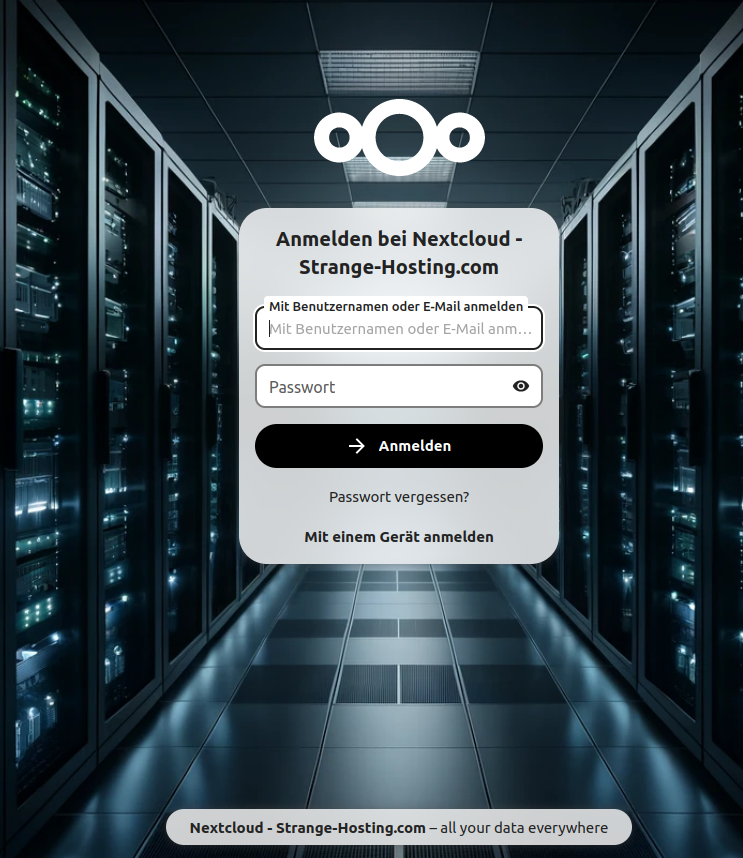
Nun kann man sich einloggen. In diesem Bild hab ich unter Einstellungen schon ein neues Hintergrundsbild gewählt
Hinweise:
Ports:
So komisch das auch klingt, port 443 muss nicht in der Docker Compose eingetragen werden, das macht der Container nachher selbst. Denn es werden noch weitere Container installiert.
Die Compose Datei
In der Compose Datei ist nur ein Container drin, dieser Container erstellt aber weitere Container.
Mit compose down. Wird nur der Container in der Compose Dateie beendet
Container beenden
docker-compose down
docker stop $(docker ps -a -q)
Container löschen
Hinweis: Container lassen sich nur löschen wenn sie nicht laufen
docker rm $(docker ps -a -q)Backup und Restore
coming soon.
Weitere DNS Namen mit Lets encrypt hinzufügen
Beschreibung:
Laut Nextcloud AIO kann nur eine Domain hinzugefügt werden, aber mit trick 17 geht das trotzdem.
Lösung:
nano /root/nextcloud/docker-compose.ymlDort folgende Kommentare hinzufügen/ entfernen:
bei den Ports den Port 80:80 auskommentieren (kommenta hinzufügen
  ports:
     # - 80:80 # Can be removed when running behind a web server or reverse proxy (like Apache, Nginx, Cloudflare Tunnel and else). See https://github.com/nextcloud/all-in-one/blob/main/reverse-proxy.md
      - 8080:8080
      - 8443:8443 # Can be removed when running behind a web server or reverse proxy (like Apache, Nginx, Cloudflare Tunnel and else). See https://github.com/nextcloud/all-in-one/blob/main/reverse-proxy.md
Und im Abschnitt environment, Kommentare bei APACHE_PORT und APACHE_BINDING entfernen.
und einen neuen Eintrag unter APACHE_BINDING einfügen
 environment
  ...
  - APACHE_PORT=11000 # Is needed when running behind a web server or reverse proxy (like Apache, Nginx, Cloudflare Tunnel and else). See https://github.com/nextcloud/all-in-one/blob/main/reverse-proxy.md
  - APACHE_IP_BINDING=127.0.0.1 # Should be set when running behind a web server or reverse proxy (like Apache, Nginx, Cloudflare Tunnel and else) that is running on the same host. See https://github.com/nextcloud/all-in-one/blob/main>
  - SKIP_DOMAIN_VALIDATION=true # neuer eintrag das Certificate nicht überpüft werden sollen
  ...
Nun den Caddy conatiner anlegen/hinzufügen in der composer Datei
 caddy:
    build: caddy:alpine
    restart: always
    container_name: caddy
    volumes:
      - ./caddy/Caddyfile:/etc/caddy/Caddyfile
      - ./certs:/certs
      - ./config:/config
      - ./data:/data
      - ./sites:/srv
    network_mode: "host"
Fetig
nun caddy ordner erstellen
mkdir /root/nextcloud/caddyDort eine Datei Caddyfile anlegen
nano /root/nextcloud/caddy/CaddyfileMöchte man erst das staging (testen der Zertifikate benutzen, einfach den kommntar weg.
Möchte man dann live gehen Kommentar wieder rein bei ca
Inhalt
example.com {
    reverse_proxy localhost:11000
    tls <deine_emailadresse> {
        #ca https://acme-staging-v02.api.letsencrypt.org/directory
    }
}

example2.com  {
    reverse_proxy localhost:11000
    tls <deine_emailadresse> {
        #ca https://acme-staging-v02.api.letsencrypt.org/directory
    }
}
Nun in der Nextcloud das überschreiben der URL einschalten
In den Container einloggen
docker exec -it nextcloud-aio-nextcloud /bin/bashNun in die Config.php in der Nextcloud instance editieren
nano /var/www/html/config/config.phpFolgende Zeile unter
 'overwritehost' => 'nextcloud.strange-hosting.com',
 #hier drunter
 'overwritecondaddr' => '^127.0.0.1$|^::1$|^172.19.0.0/16$', #diese zeile einfügen/ergänzen
Fertig
Outlook Plugin - Nextcloud Anhänge
Beschreibung:
Ein kostenloses Plugin für Outlook und Nextcloud zum hochladen von großen Dateianhängen
Vorrausetzung:
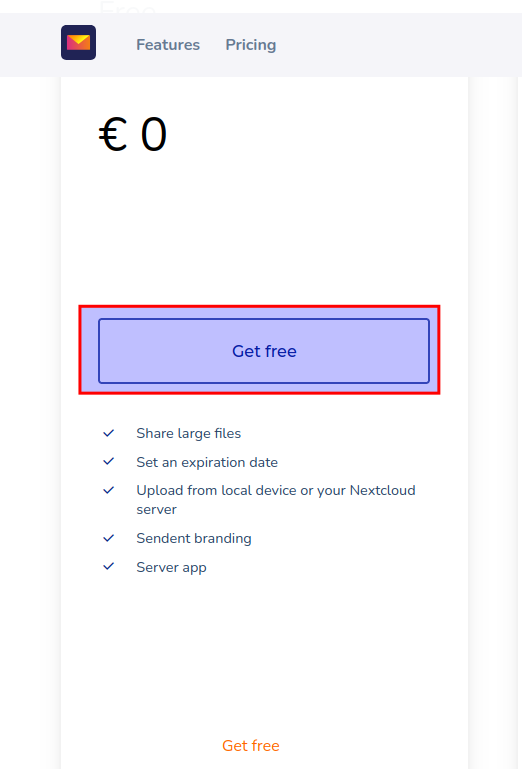
Auf der Webseite anmelden übers Formular
https://sendent.com/sendent-free/
Nun hier einen Lizenzschlüssel erweben kostepflichtig oder kostenlos, je nach dem.
Wir nehmen kostenlos
https://sendent.com/products/sendent-for-microsoft-outlook/pricing/
Installation
In der Nextcloud anmelden und im App store die Sendent App downloaden
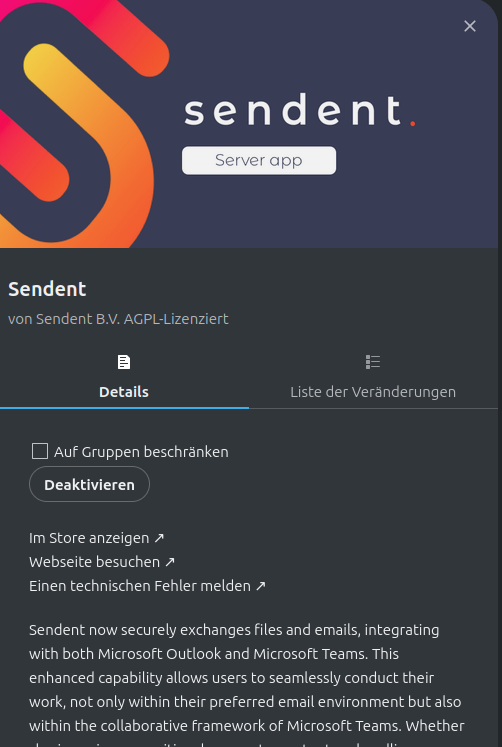
Dann unter Verwaltungseinstellungen gehen
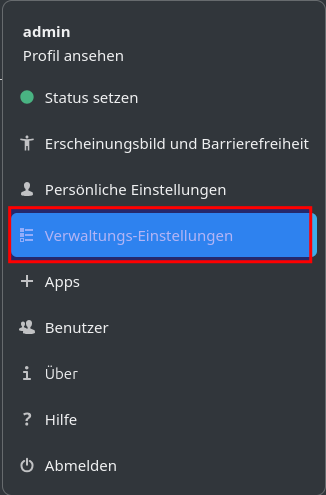
Dann im Menü sendent auswählen
(mit STRG+F5 die Seite mit Cache leeren neu laden, falls dann Sendent nicht in der Liste links steht)
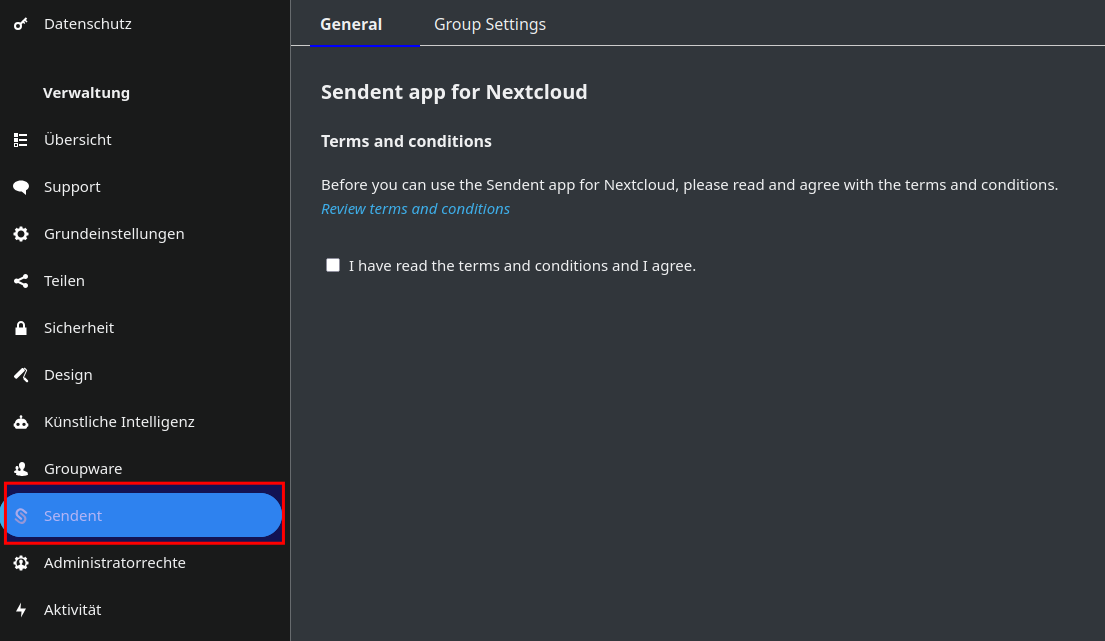
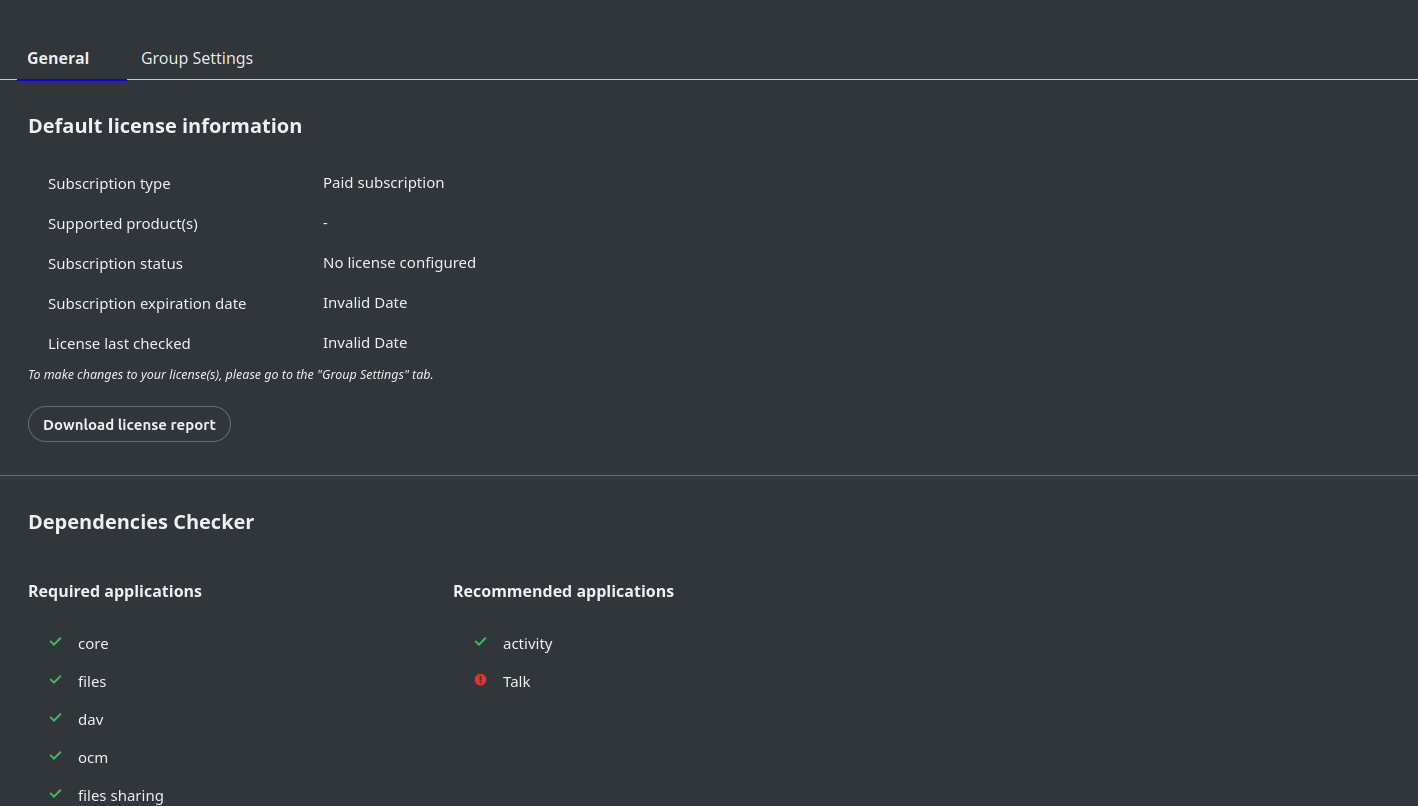
Dann die Terms akzeptieren dannach erscheint die Übersicht
Nun in der Willkommens Email den Client runterladen.
Den ersten link, der da Drunter ist ein Guide
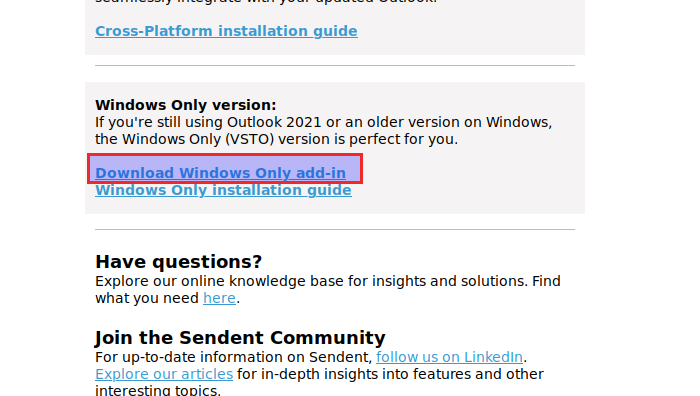
In der Zip Datei die Jeweilige Variante von Outlook x64 oder x86 installieren.
Ich habe ein 32 Bit outlook also x86

Das Setup
Plugin konfiguration:
Nextcloud URL eingeben, ist eigentlich schon vor ausgefüllt und auf anmelden klicken
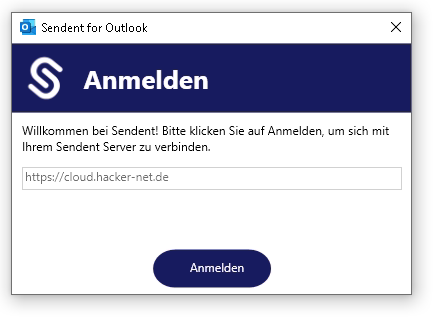
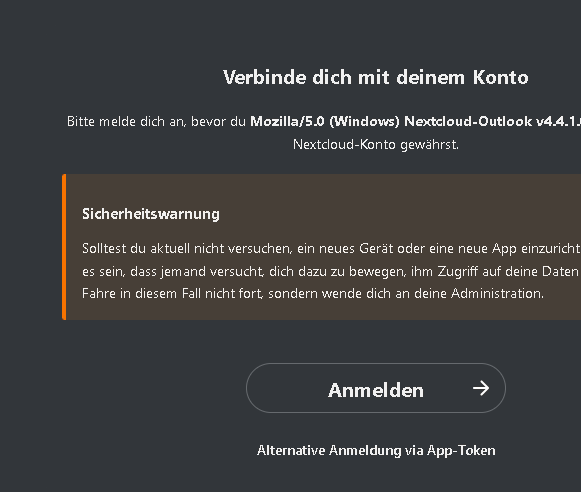
Nun öffnet sich die Nextcloud Website zum anmleden und Zugriff gewähren
API Calls
Nextcloud App zum benutzer hinzufügen
Beschreibung:
Ein Link zum erstellen eines Programms zum anlegen von Benutzern aus eine Benutzerliste
https://github.com/t-markmann/nc-userimporter/tree/master
Aber Falls das Projekt mal stribt, eine Version im Anhang: nc-userimporter-master.zip
Vorraussetzung
Python3 ist installiert und die Librarys
apt install python3 python-is-python3
python -m pip install --user requests
python -m pip install --user BeautifulSoup4
python -m pip install --user tabulate
python -m pip install --user qrcode
python -m pip install --user reportlab
Benutzung:
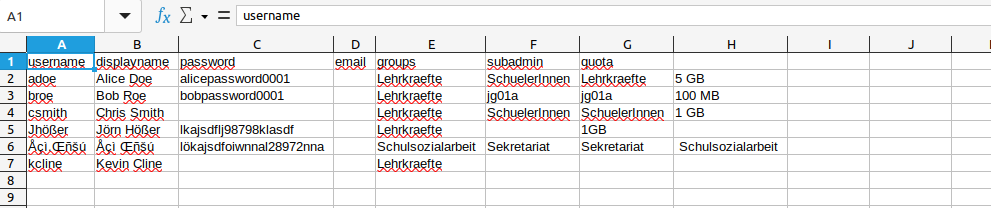
Die users.csv mit den Benutzerdaten füllen, Felder die nicht ausgefüllt werden, werden nicht gesetzt.
Nun in der config.xml die Daten anpassen.
Dieser Abschnitt ist eigentlich nur wichtig
<config>
<!-- Sensitive data! Delete this information after successful data import -->
    <cloudurl>YOUR-CLOUD-URL</cloudurl> <!-- CHANGE THIS to your cloud domain, e.g. mycloud.mydomain.org or www.mydomain.org/mycloud (without https://) -->
    <adminname>YOUR-ADMIN-USERNAME</adminname> <!-- CHANGE THIS to your cloud user, who has admin permissions-->
    <!-- Attention: Please note most special characters are not allowed in passwords, including german umlauts -->
	<adminpass>YOUR-ADMIN-PASSWORD</adminpass> <!-- CHANGE THIS to the password for that user -->
    <!-- Attention: Please note some special characters are not allowed in passwords, avoid using ) } ; # -->
Und dieser Falls man keine Semikolon getrennte CSV Datei hat.
<!-- Settings -->
    <csvfile>users.csv</csvfile> <!-- enter the name of the user-csv-file to be imported. (e.g. teachers.csv). The file must be located in the root directory of the script. Default: users.csv-->
    <csvdelimiter>;</csvdelimiter> <!-- change this to ; if you create your CSV-file with Apple Numbers -->  <!-- dieser Abschnitt interessiert uns, wenn wir es ändern wollen -->
    <csvdelimitergroups>,</csvdelimitergroups> <!-- change this to , if you create your CSV-file with Apple Numbers -->
    <pdfonedoc>yes</pdfonedoc> <!-- choose 'no' if you want to get a pdf-file for each user. choose 'yes' if you want to get a single pdf-file with all users -->
    <generatepassword>yes</generatepassword> <!-- Select yes if you want a password to be generated automatically if no password is specified in user-csv-file. Select no if you want an e-mail to be sent to the user instead with a request to e
Nun das Programm ausführen.
python3 nc-userimporter.pyFür die Installation unter Windows gibt es auf der Github seite die Exe, oder in der Wiki den Artikel Python Executable mit dem python installer, siehe hier . Dazu muss python unter Windows natürlich schon Installiert sein, siehe hier.
Mit dem installer kann man auch eine MacOS Variante bauen.